I haven’t posted much lately, because not much has been happening … at least not until this week. My mom was in town for my birthday on April 1, and we had a really great time. She was here for almost two weeks.
After talking with her a lot about the last two years, I decided that I am going to write a book about my experiences for the last few years. I have been working on that pretty consistently, trying to do a little bit of work at least every day. So there hasn’t been much current stuff to write about from Ocean Beach other than the obvious.
Both times we visited multiple wineries (through the Harvest Hosts program, as usual), and had amazing dinners at the local restaurants. We decided to head back to wine country for a couple of days.
(in 2021)
This time was no different … well, except it was very different. We didn’t take Dolly, which felt kind of weird – we decided to save gas and time by taking Belinda’s mother’s hybrid SUV, and we also took Belinda’s mom, Betty, and her friend, Ron. We stayed in an Air BnB instead of a hotel or RV, and we were there for two nights and three days.
(In 2022)
Two or three wineries per day should really be anyone’s limit if you’re actually trying to enjoy yourself. We wanted to sample the best wines and bring back our favorites; if you have too much wine in one day you can’t even keep up with the wines that you like.
Still, Beli’s mom kept referring to us (lovingly) as “borrachitas.”
On Monday, we arrived an hour before our Air BnB check-in time, so we stopped at Bianchi Winery for a tasting flight. Belinda decided to become a wine club member (which often saves you a lot of money if you’re enjoying the wines from that particular place), and I got a bottle of the Chardonnay.
For the most part, Paso Robles wineries specialize in reds. Most place have at least a white blend or a rosé, but they all have great selections of GSMs, Cabs, Pinots, and all the best red varietals. Which Belinda and I both like, since we are mostly fans of reds as well. This Chardonnay from Bianchi almost had a creamy or buttery effect as you sip it … perfect to pair with an amazing dinner.
Speaking of dinner, we revisited a place that was our second favorite restaurant in Paso: The Hatch Rotisserie, a relaxed but classy joint that serves delicious food. It was fried chicken night, so we had to try it…
… but the star is their most amazing mushroom appetizer – it’s a handful of hen-of-the-woods mushrooms, wood-grilled, so they have a huge smoke flavor, topped with parmesan and green onion and then served with a spicy aioli.
It’s super simple but executed in a way that just makes you crave more of it every bite you take. It’s magical.
While we were waiting to get a table at the Hatch, we stopped at a small tasting room called CaliPaso Wines, which had a delightful red. This was perhaps our third communal bottle of the day… so, you know, it was a long trip.
The next morning, we found a coupon in our AirBnb for a 2-for-1 wine tasting at Barton Family Cellars, also known as Grey Wolf, which happens to be just next door to another one we wanted to revisit, Dark Star Cellars.
After a tasting and lunch at Grey Wolf, we went to Dark Star.
We had stayed at Dark Star before, when we were in the RV, since it’s a Harvest Host, and I was eager to go back and get a bottle of their “Chain Reaction” party blend.
They have a lot of other great reds and whites, all of which are unique because they rarely filter either type of wine, so the flavor is heavier.
They have a great homey atmosphere at Dark Star – the last time we were there, the vintner had a baby on her hip, and this time, little Lucille was running around with her big sister and chasing the chickens that roam the property. It was delightful to see the same people again!
That night, we returned to downtown Paso Robles (where most of the restaurants are), and had another incredible meal at the Fish Gaucho restaurant. We split the tab again with a bunch of small shareable plates and appetizers, like oysters…
… and halibut tacos …
… as well as an amazing pork chop dish with Brussels sprouts and mezcal applesauce.
It was incredible. I don’t think I have ever had a bad dish in Paso Robles; but also my friends tend to gravitate towards the five-star joints. Thank goodness they also help me pay!
I have a special place in my heart for VOTM; it’s the only winery of which I have ever become a member, despite the relatively high number of wineries I have visited in the last two years. The owners, Victor and Jennifer, are the nicest people you’ll ever meet; and they both had totally different careers before Victor got the idea that he wanted to grow grapes and make wines.
They have a lovely family, a super comfy and well-designed tasting room, and their wine club has the best perks – Victor used to be a sound engineer for all of the big names in the music industry, and he’s a huge music buff, so every membership comes with a personally curated Spotify playlist. When we showed up on a Wednesday, a day they are typically closed, Jennifer was kind enough to open up just for us and gave us all a free tasting using my membership. I tell you, they’re the best people.
Chronic was literally the first wine I had that I ever enjoyed (although certainly not the last); Belinda made me try their Sofa King Bueno (say it fast) years ago, and it’s one of the best red blends you’ll ever drink.
Chronic is literally across the street from Vines on the Marycrest, and since Belinda had a membership at Chronic … well, let’s just say, the vehicle was a lot heavier on the way home.
Be sure to follow Starbright’s Adventure on social media to see how I’m pairing all of this amazing wine. I plan to be around Southern California for the summer, mostly because the gas prices make it prohibitively expensive to go anywhere, but also because it’s the best place to be during the summer. Hopefully I can save enough to make it to my sister’s house in Houston by September.
Are you enjoying this content? Please help support my adventure by donating to my trip GoFundMe campaign here. You can also donate directly to me – even set up a monthly or yearly contribution – via the new “Donate” tool, on the sidebar —>
I left my mom’s house in the middle of January; and it’s been a wild ride. The trip west was thankfully mostly uneventful. At least, I didn’t break down again. Not going west, anyway. (More about that later.)
It was really nice to be back on the road again, especially being parked mostly for the last couple of months – after a month with my sister and almost 6 weeks with my mom. I mostly stayed at stores and truck stops on the way west – if I am in a hurry and there aren’t any conveniently-located Harvest Hosts or campgrounds, it’s usually just easier to stay someplace right off of the freeway. So that’s what I mostly did as I made my way west; with a few exceptions. The first night, I made it to Chattanooga, and the next day I drove southwest through Alabama and into Mississippi.
My second night, I stayed at Turkey Creek Water Park, a lovely lake campground in Decatur, Mississippi, which was very nice and peaceful, even if it was just for one night. If I had had the time, I could have stayed there for a week.
The next night, I was in New Orleans, so I stayed at a cool Harvest Host that’s right off of the freeway – Faubourg Brewing. It’s a huge facility that allows overnight parking for RVs whether or not they are part of the Harvest Hosts program.
It was a great stop. They checked Covid vaccine cards (unlike pretty much everywhere else in the South), so I felt safe drinking indoors, and they had lots of empty space, both in the RV lot and in the tasting room. I had a nice evening, drinking and enjoying the view.
My sister still lives in Houston, but since I left her house in November, I had wanted to stop at a restaurant near the coast. There was a Texas travel magazine at her house that I picked up at some point – it had a feature on the Schooner Restaurant in Nederland, where they specialize in barbequed crabs.
Basically, these crabs have haunted my dreams ever since I read about them. I decided to stop in Nederland for the night – camping at a Wal-Mart parking lot across the street from The Schooner – then I would drive the short two hours to my sister’s, so I could spend the day and the night with her and my brother-in-law and get on the road again early the next morning.
The crabs (and blackened trout, hush puppies, and deviled crab) at the Schooner were just awesome. It was totally worth going out of my way to taste them and enjoy the Gulf Coast.
The rest of my trip west was uneventful – no bad weather, crazy people, or mechanical troubles.
I made it to San Diego on a Thursday, with doctor’s appointments Friday and all of the next week, interrupted by a day of fun with my brother at the Peanuts Festival at Knott’s Berry Farm.
We had an awesome time, but after all that driving, then doctors, and a theme park, I was exhausted.
I laid low for the next few days, resting and getting some of my medical tests out of the way. The department that handles my bone scans (I get full-body bone scans, brain MRIs and abdominal CT scans every three months or so) was super backed up, so even though it was barely February, I couldn’t schedule my scan until March 1st.
I decided to take it easy on Dolly as well, especially with gas prices on the west coast flirting with $6 per gallon. I spent a couple of weeks hanging out on the beach in my beloved OB, and seeing other friends around town.
I also planned to go north for a week or so to Oxnard to see my brother and my sweet kitty Janis.
It was a great plan, but fate had other ideas.
Dolly broke down again on the way, leaving me stranded on the side of the 405 for hours while I waited for a tow truck. I managed to get a tow- finally –
… and spent the night in a CVS parking lot, then Dolly started up just fine in the morning and I drove the rest of the way to my brother’s house.
It was so great to see Janis again.
I miss her so much, but it’s good to know she’s happy and really spoiled. She spends most of her day chasing a patch of sunlight across the living room.
My stepbrother was also in town for work and had free tickets to a comedy show, so my brother and I decided to join him. We had a fun night; the comedians were funny, and we had good food and cocktails.
Forty-two states, you guys. Almost 50,000 miles.
Almost two years traversing the country during a pandemic. Mostly using cloth masks.
I was in red states, with most people refusing to wear a mask or get vaccinated, when the Deltra variant was spreading.
I was on the road for months before there was even a vaccine or hope for one.
In all that time, I never got Covid.
Back in California, they lifted the mask mandate. Two days later I went to a club with my brothers and two of us got it.
It was really weird the way it hit us, too.
We are pretty sure we got it at the comedy club on a Saturday night. On Monday, my brother had a fever and cold symptoms, then tested positive using a home test in the morning. He stayed isolated (luckily, they live in a big house). Everyone else got tested and were all negative, for days. Sunday rolls around – a full 8 days after exposure – and my nephew’s fiancée flies in from Canada. I got to meet her, and we all enjoyed a big dinner, including my brother’s elderly mother-in-law. About two hours later, I get extreme chills, a fever, and body aches. Monday morning, I tested positive, so I isolated in my RV.
I was in the Oxnard/Ventura for over a week before I tested positive, waiting to hear from a guy in Riverside who supposedly could get the part to fix my fridge. There seems to be no rhyme or reason for why the breakdowns happen, and Dolly always starts up again and runs just fine afterwards. I guess this is just going to have to be part of the adventure- I never know when I’ll just be stuck and my plans will be disrupted because Dolly wasn’t feeling like it. (That fridge guy has stopped answering his phone, too.)
I stayed isolated a block from my brother’s house until I felt better, then I headed south to San Diego. I was still worried Dolly would swoon again, so I didn’t go far the first night. I was lucky enough to get a spot at Leo Carillo State Park, which was amazing.
It’s normally next to impossible to get a reservation there because it’s literally on the beach in Malibu, but it had been closed due to flooding, and I think most people didn’t realize it had reopened.
I spent a lovely night there – practically in a canyon, just steps from the beach. I could have spent a few more days there, but I was still super sleepy even after my fever and other symptoms went away. I haven’t had that type of exhaustion since I had chemotherapy! I was so sleepy, I barely got to enjoy my surroundings at Leo Carillo.
I made it back to Ocean Beach, but I stayed isolated – except for masked trips to get groceries – until I tested negative on the home test.
I had to postpone an already-late bone scan and an MRI on the lump on my wrist because I was sick, and I just got them all done. I need to meet with an orthopedic surgeon to see if surgery is necessary. In the meantime, I am enjoying parking on the beach and being able to hang out in Ocean Beach like I used to.
As you can see, I have been parking on the street in OB. San Diego allows people to sleep in their vehicles, provided they are moved at least every 72 hours. I never stay in one spot for more than 48 hours (usually just for one night), and I am always clean, quiet and respectful. I don’t leave trash behind or disturb the neighborhood. And for weeks, I haven’t had a single problem.
Last night I was parked in OB, and after I turned out the light to sleep, I heard yelling. Apparently, it was the guy whose house I had parked in front of, and he was yelling “Move on, Tennessee!” and “You can’t camp in my fuckin front yard!” I also heard weird banging noises. I was parked on a public street, and I had done nothing to disturb or offend this man. I didn’t know what he would do, so I just stayed still and went to sleep. In the morning, I discovered that the banging noises I heard were him chucking half-full water bottles at my RV in the middle of the night.
Needless to say, I got out of there.
I think he was upset by my Tennessee plates – maybe I need to put a big OB bumper sticker on my RV so people know I live here.
For the record, I registered Dolly in Tennessee, at my mom’s house, and under both of our names, because I am going to die soon, and I don’t want my mom to have to deal with a probate court to get my stuff. This way all she has to do is send the county clerk a copy of my death certificate and they take my name off of the registration.
Regardless, it seems to be pissing people off. As soon as I had moved away from this horrible angry person, I managed to find another. I was moving to a slightly different part of OB to see my friend. I found a great spot near a church and on a wide, empty street. It looked great.
Not even ten minutes after I parked, I got this lady going nuts on me.
Now, San Diego has legalized sleeping in your vehicle, and any laws that deal with oversized vehicles do not apply to me (definition per law of oversized is over 27 feet long AND 7 feet tall, and Dolly is only 22 feet long). Also, since it was morning, she had no way of knowing if I was camping there or not. It’s legal to park there, but this old hag decided that it wasn’t going to happen in her neighborhood.
After she threatened me, I stayed on hold with the San Diego Police non-emergency line for 30 minutes, until she came back and started harassing me again. Then, I called 911, told the dispatcher someone was harassing and threatening me, and … the cops never showed. After about 20 minutes the old lady gave up and went home; I waited a little longer but clearly this wasn’t a priority for any police, so I moved.
This just happened a few hours ago, and I am starting to feel kinda anxious. Weeks with no problem – and two people going off on me in less than 24 hours – is making me feel kind of weird. But there’s not a lot of other options that don’t cost a ton of money.
My birthday is coming up on April 1, and my mom will probably be coming out here to join me for it. I’d like to go back to Paso Robles for my big day, but the way gas prices are right now, maybe staying close to home is a better idea. Stay tuned to see where we end up!
Follow me on social media for updates, and I’ll see you all out there on the road!
Are you enjoying this content? Want to help out Dolly’s gas tank? Donate to my GoFundMe here: https://gofund.me/b8333d49
I haven’t posted much lately – nothing here, and far less on social media than I usually do – but, then again, I haven’t done much, either. I basically realized that, on my social security income, I cannot afford the full-time RV travelling life. I have help from friends and family, but the road isn’t cheap. I decided that the holiday season would be the perfect time to shack up with the family who always says they miss me.
I finally got my bone scan done in San Diego in mid-October, after spending a couple of weeks at my brother’s house in Ventura; getting to know the family a little better and spending time with Janis. I hit the road right away, spending only one night at my Dad’s in San Bernardino, and heading north to Las Vegas, then east to the Four Corners and south again to my sister’s in Houston.
It was a fairly uneventful trip east, because I didn’t have the money to stay at a fancy Harvest Host or campground, plus I was in areas that didn’t have much. I say “fairly,” because the morning that I was almost at my sister’s, my refrigerator stopped working.
I thought I could make it to Houston, but it was close – I literally had just texted my sister, telling her I was ten minutes away – the engine died literally as I was pulling off of the freeway. It was brutal; I was in a three-lane exit ramp during rush hour, and it was a really, really bad time to discover that my hazard lights also didn’t work. My sister’s boyfriend was perched on the rear bumper for a good 45 minutes, directing traffic away from Dolly, until we were able to punch the gas and get to a parking lot nearby.
I finally got Dolly towed to my sister’s house, not even a few miles away, and tried to find a good mechanic. Between the confusion about how to get it fixed – RV techs won’t look at the engine, and mechanics won’t work on a RV right off the bat – that was way more of an ordeal than I anticipated. It took weeks to find a tech to come look at it, and then afterwards, my fridge still didn’t cool anything even though the motor was now running. My lights worked, and my engine started, but I had no idea why it broke down again, seemingly for the same reasons.
My stepdad has been saying since Dolly started doing this same thing while breaking down that it was the ignition coil. I was able to get one and get a local mobile mechanic in Houston to install it, and by that time I had been in Houston for nearly a month.
Of course, I made the best out of being “stuck” in a great city like Houston.
My sister has lived in Houston for a few years now, in a super cute neighborhood near their Produce District. Every year the neighborhood association puts on a Dia de Los Muertos festival in their local park, and my sister is a huge part of the planning and organization. This year, for once, I got to be there to experience it.
It was pretty spectacular. The costumes and decorations were brilliant, and the food was amazing. I had churros and tacos and beer and I watched beautiful dancing and met all of my sister’s neighbors and friends.
My sister and her boyfriend have undergone a total diet and lifestyle transformation this year, cutting out all alcohol, most sugar (except for natural sugars in berries and whatnot), most fats (except for the healthiest avocados, etc.), and most carbs but the most complex and healthy. I’m so proud of them for the transformations they have made. Most of our meals consisted of lean meats, roasted or low-oil-sauteed veggies, an ancient grain or two, and very little, if any, sugar.
This was our Thanksgiving dinner: lean turkey breast, a root vegetable mash, roasted acorn squash with an ancient grain stuffing, a tabouli-type salad with fresh herbs, low-fat feta, pomegranate seeds and more. The red stuff is a faked-out cranberry sauce I made with hibiscus and apple. Everything was really delicious, and it was fun to try new healthy variations on some favorites.
Of course, I also took advantage of the amazing food scene and ate out a bit as well.
Houston is rightfully known as a great foodie town and is one of the most diverse cities anywhere. In addition to being right next to Mexico and Louisiana (so Mexican and Cajun food is off the hook); there are huge Thai, Vietnamese, and Arab communities, so the ethnic food of every type is great everywhere.
I had some really incredible food, just within walking distance of my sister’s house. There is an amazing Thai street food place, where I had delicious curry, Tom Ka Gai soup, and chicken appetizers, not even a half mile away.
A few blocks in the other direction is a famous Mexican joint, Teotihuacan Cafe.
Down another street, towards the farmers market that is the heart of the Produce District, and on the way to a street corner with a taco shop, a famous Mexican bakery, and a spice store, there is an amazing cheese shop with free samples. I had a blast walking around.
If you’re ever in the neighborhood, Houston Dairymaids is worth a taste.
While I was there, a fan of my Instagram page contacted me about Hugs and Donuts and encouraged me to check it out. I got an amazing boudin kolache and a cherry chocolate shortbread donut. Magnificent.
Of course, it wasn’t all in one neighborhood. I met up with one of my old friends from college, who treated me to a super fancy and decadent dinner at Caracol, an elaborate Mexican restaurant in the fancy tourist part of town. I had some amazing oysters, wood-grilled with cheese, chipotle butter and breadcrumbs, and enjoyed a great evening with an old friend.
As you can see, I had a fabulous time eating my way around town. But just as often, I was chilling at my sister’s house, playing with her sweet kitties (especially the luscious Nerms, below).
I was there for weeks, and while I had many good days, where I felt great walking all around the neighborhood, I think I had just as many low-energy, not-so-good days. It’s been like that for a while, now that I think about it; but I am trying to focus on the good days and enjoy life as much as I can. That’s the whole reason I am on this trip, anyway!
So, after a month, and a new ignition coil, I hit the road for 2-3 days to my mom’s house in east Tennessee. All I wanted was an uneventful and safe trip, and I got it.
The first night was in Louisiana, where breakfast was a boudin ball from a gas station. If you’re not familiar, the best food in most parts of the south is at gas stations. Food desert doesn’t even begin to describe some of these areas.
I stopped the next night in Mississippi, then in Alabama (both at truck stops just to make it easier and cheaper), then I was, miraculously, without incident, at my mom’s house in the Smokies. I hadn’t realized how anxious I was about the engine dying, or something crazy happening, until I finally got out of the RV and hugged my mom, and realized I was really, really there.
Not long after I got here, there were major tornadoes and thunderstorms across Tennessee and Kentucky, but luckily they were far from us. We got a few menacing-looking clouds, but nothing too serious.
I have spent most of my time relaxing, cooking, and doing artwork.
I used to do oil painting as a kid and it was a lot of fun. I know my mom was disappointed that I kind of stopped doing art as an adult (except for cooking and some needlework stuff), but really I think it was because my apartment was too small to do a lot of projects.
Regardless, I got the chance to make up for lost time, doing some paint-by-number coloring and painting projects, as well as painting a big empty wall in the basement.
Before (above) and After (below). And, yes, I used the magical hula hoop I got from Raiye at Rabid Brewing in Chicago.
During the drive to my sister’s, headed east through Arizona and New Mexico, I started to feel tiny pains in my left wrist. By the time I had been at in Houston for a couple of weeks, I had a lump on my wristbone that was freaking me out, so I started wearing a wrist brace to prevent any potential damage. I called my doctor, who basically said he couldn’t do anything until I came back.
After a couple of weeks in Tennessee, I ran out of CBDs at the same time that I weaned myself off of Baclofen, a back-spasm-reducing drug that I had been taking for way longer than the recommended time due to my back pain. It was bad timing, for sure. I was in so much pain that I was ready to cut short my time in Tennessee and go back to San Diego right away.
Luckily, I got a hookup on some good CBD capsules, and within days my pain was much better and more manageable. My mom briefly planned to come back with me, but she has her own health issues to take care of, so she will hopefully get to join me in California sooner rather than later.
We had a really lovely, but small, New Year’s celebration, complete with a huge party cheese plate and spread …
and, of course, some black-eyed peas with greens and cornbread for good luck on New Year’s day.
As I sit here now, finishing this post, I am planning to leave tomorrow from my mom’s house, head straight south through Alabama to Interstate 10, then straight west, as far south as I can be, until we get back to San Diego. Of course, I will stop to see my sister in Houston again on my way. I have an appointment with Dr. Vlad on January 21 already, so if I am back earlier, I will try to see him to check out my wrist.
It’s been a wonderful and relaxing couple of months with family, but the weather out here is too cold.
I can’t wait to get back to the beach!
Follow me on social media for updates, and I’ll see you all out there on the road!
After I dropped Jen off in Minneapolis, I planned to see Paisley Park, the home and music studio of The Artist formerly known as Prince. Unfortunately, unlike the lame Graceland, they don’t just let anybody inside, and I decided that the $65 entry fee would be better spent on gas to keep the party going.
That night I camped at a beautiful berry farm in mid-Minnesota – no mean feat considering pretty much everything around here is a soybean or corn field. Minnesota kind of smells like poo most of the time, if I’m honest – if it’s not a field, it’s a fertilizer plant or a dairy farm full of cows. I really lucked out finding the one place in the state that wasn’t a giant cow pattie.
It was a lovely little Harvest Host where they grew ariona “super” berrries, which I got to sample in some lovely gluten free bars, and I bought a couple of bags of frozen berries to take with me for smoothies.
The next day I crossed the Mississippi River into Wisconsin; which reminds me a lot of Tennessee in many ways.
There are a lot of trees, lots of greenery, lots of farms and food. Like, they loooove their food here.
They love cheese and dairy. They love ice cream and beer.
They love their fish fries and their mustard on their brats and oh my god did I mention the cheese.
They’re cheese people.
They *get* me.
I stayed in Madison for several days, at a Harvest Host for one night, and with Jessica, an old friend from high school for a couple more. I basically ate the entire time. Tons of cheese, tons of fish, lots of beer. And it was really amazing to see my old friend after such a long time.
In fact, I got two-for-one on the old high school friends deal. My other high school buddy Kristen, who works for Google in San Jose, took Dolly for a test drive back in May when I stopped to see her. Kristen and her husband had already been considering taking their four kids on a road trip, and meeting Dolly clinched it for them … a month later they purchased their own RV and were on the road, doing an epic (albeit shorter than mine) road trip with their kids during the summer.
They happened to be driving through Madison at the same time I was at Jessica’s, so they stopped by for a few selfies of Dolly and Blanche (their RV) together!
Next, I went to southern Wisconsin, to an adorable little town on the banks of the Mississippi called Potosi. I spent one night at a Harvest Host, the Potosi Brewing Company, which has a fantastic brewpub (try the mac and cheese) …
… as well as a cool brewing museum. I told ya, they are all about the beer and cheese around Wisconsin.
For the next two nights, I was camping at the Grant River campground, just across the Mississippi from Iowa.
It was a little humid in Wisconsin in the summer (the weather is a lot like Tennessee IMO), so I was glad to have the air conditioner running for a couple of days.
While I was there. I also drove through a town called Dickeyville, which has this incredible grotto outside of the local Catholic church.
A parish priest built this amazing work of art – it must have taken decades – out of millions of rocks, shells, charms, antiques, pottery, gems, and various other items.
It’s really spectacular.
I also spent a couple of days around the Chicago area – I stayed at two different breweries that are Harvest Hosts, and another two nights at a Boondockers Welcome spot. The weather was great and I ate a ton. One of the breweries was Riverlands, where I stayed on a previous trip through Chicagoland. They have an impeccable IPA (several, actually) and I also got a fabulous Lou Malnati’s deep-dish Chicago style pizza.
The second Harvest Host brewery was a lot of fun… Rabid Brewing is just on the outskirts of Chicago, and their IPAs and hazy ales are delicious.
I spent a lovely evening with the brewmistress Raiye, who told me about the amazing beer they make, and who schooled me in how to hula hoop. I was a little tipsy, and I hadn’t used a hula hoop in years – and hula hoops are a little bit random for a brewery manager’s side hobby – but it was a ton of unexpected fun! (Check my Instagram videos for more on my hula hooping progress.)
Before I left Chicagoland – which is basically all of northern Illinois – I got to meet up with another friend from college, which was fantastic. We had a great soul food lunch in Chicago, and then I got to relax for a couple of days.
Of course, I still kept stuffing my face. Shuntae recommended that I try a slice of chocolate cake and a hot Italian beef sandwich (“wet” and with sweet peppers) from Portillo’s.
That was pretty incredible.
I was on my way to Fort Wayne Indiana, to hang out with yet another high school buddy I haven’t seen in years, I stopped at the Indiana Dunes state and national park right in northern Indiana.
It was a pretty nice beach, for not actually being at the ocean. And I checked one more national park off of my list!
Then I spent two nights in Fort Wayne, and my friend Jeannie took me all around to see the sights.
They have a lovely park and downtown area near the river and a historical fort, and we had a great time seeing the sights and eating a bunch.
I basically ate like crazy everywhere I went in the Midwest.
Then I had to head back north to Michigan for my friend’s wedding. I stayed at a few more cool Harvest Hosts on the way – first, a cool bison farm in Indiana. Eel River Bison Ranch was a lovely and peaceful stay, and I left with several packs of delicious bison meat.
I had no idea about how they used to make and use RVs back in the day, but it was really cool to see all the amazing antique motorhomes.
Mia is a dear friend of mine from college, She and I were roommates senior year, and we worked together on the newspaper staff for four years. She has had to reschedule her wedding several times due to Covid. This time, with the Delta variant causing all kinds of problems nationwide, they rescheduled the wedding again, but then asked for everyone to be masked and to take a home test before attending. I also got my third Covid vaccine (my doctor recommended it due to my compromised immune system) just to have a little extra protection.
The wedding was super fun – I got to dance, eat delicious catered food, have a few drinks with old friends from college …
… and watch my good friend get married. It was a long trip to get all the way to Michigan, but I am so glad I did it. It was all worth it.
While I was in Lansing, I stayed at a Boondockers Welcome host that was really amazing – they let me shower and do laundry and use their water and power, so I could get ready and enjoy my time with my friends after the wedding was over.
After the wedding, my goal was to get home to San Diego as soon as possible.
I was tired of driving, and of the fires, and the heat, and I craved the smell of the Pacific Ocean and a taco in San Diego. I wanted to see my brother, my friends, and maybe park for a few days in a peaceful place without crazy weather.
It was going to be a long drive, and my plan was to drive as much as I could and then stop at truck stops or big box stores instead of Harvest Hosts or campgrounds. Truck stops are great when you don’t want any fuss. I knew that this way, I wouldn’t have to reserve anything ahead of time, and there would be showers, gas, propane, dump stations, food, and a safe place to sleep. Plus they are all right off if the freeway and open 24 hours, with security and people around all of the time.
I figured this would me back to the beach in record time. I made it a few days from Michigan, through Missouri, without incident.
However, Dolly had other plans. She was not appreciative of my plan to cross seven states in as many days, stopping only to sleep. She decided to show me this attitude when we were in Kansas.
It was really hot. Hot for anywhere, but really hot for Kansas – 100 to 102 at the hottest. I had been driving straight west on the 70 after going south to Indianapolis from Michigan.
That morning I had been in Missouri, and I really wanted to make it to Colorado before I slept.
It was an hour before sunset; 120 miles to the Colorado border, and 102 degrees outside.
Dolly gave up.
I managed to make it off of the freeway because I was right next to a freeway exit. The engine died in the same way it had when I was in Montana, so I suspected that there might be more rodent damage and/or damaged wiring. Last time it was a spark plug wire, so maybe it was a spark plug. I prayed it was something minor because I couldn’t afford a big repair job.
Inexplicably, after a very long and very hot and uncomfortable night in a Kansas truck stop, the engine started and didn’t die again. At this point, I was feeling kind of uncharitable towards Kansas.
But it got better. I called a mobile mechanic; who was super busy but (luckily) didn’t charge me to stop by and poke round for a few minutes. He said there wasn’t any rodent damage to spark plug or any other wires that he could see. And the engine was running. So I, figured what the hell and I decided to hit the road again.
I made it to Colorado that day … maybe 35 miles into the state. I only drove a couple of hours, and it wasn’t nearly as hot as it had been the day before. That day was uneventful, so the next morning I continued through Colorado on Interstate 70.
It was beautiful – Colorado is just breathtaking – but I will never take this route again in an RV.
I made it through the Mile-High City just fine, but west of Denver is when the real mountains start. It’s a very gradual climb – Dolly wasn’t complaining at all. Same as always, no overheating, no lights. I was at over 11,000 elevation.
The freeway climbs and climbs and climbs, then, at 11,158 feet, there’s the Eisenhower Tunnel. According to the internet, the length of the tunnel less than two miles, but it feels so long. Really everything feels different when you’re at that kind of altitude.
Remember in my last post, when I talked about how scary it was when the engine died in Montana, right as I was going down a mountain? Well, I need to rephrase, because that one in Montana wasn’t really a mountain. THIS was a mountain. I was nearly out of the tunnel – like, less than 10 yards – when the speed started to drop, despite me pressing the gas. I knew something was up even though the lights hadn’t come on yet.
If you’ve never been through this tunnel, let me paint a picture. As I mentioned, it’s at extreme altitude. It’s a one-way tunnel, two lanes, just like the freeway. Just as you leave the tunnel, there is a brake check area for trucks, because about 100 feet later, there is a steep, steep grade for almost eight miles, straight down a mountain.
If the engine had died when I was in the middle of the tunnel, I’d have been (at the least) rear-ended and stuck in a damn tunnel. If it had died a minute later, I would have been speeding down a mountain at the time, which would have ended up with me probably in one of those runaway truck ramps, in a pile of sand. As it happened, it was at the exact perfect time, and I was able to punch the gas and get Dolly into the brake check area before the engine completely died.
So, a similar refrain in my life the last year or so: It sucked, but it could have been worse in several different ways.
After what had happened in Kansas, I decided to stay there for an hour or so, both to let the engine rest, and to chill out myself (that was a little bit stressful!), and then it was fine. I made it to a slightly lower elevation, planning to camp at a truck stop or something, but there were none to be found. This was in the fancy touristy area of Colorado, with all of the ski lifts and bungalows, so no overnight parking was allowed in any of the gas stations or big box stores.
I was starting to feel a little too stressed. All I wanted was to get home. I was running out of money, I was afraid my engine could die at any moment, and I didn’t have a free place to camp. This was the longest I had been on the road by myself without a long pit stop in San Diego or with family.
I lucked out.
I found a local campground called Heaton Bay. It’s in Frisco, Colorado, right in the middle of the Rockies and the White River National Forest.
It was just spectacular.
As soon as I got here, I felt the stress melt away. It was like someone gave me a happy shot.
I instantly felt better and calmer and … just in general, less agitated about everything.
I figured this was the Universe telling me to take it easy; to stop and enjoy the scenery instead of trying to blast my way through the western states and get home at record speed. For sure, it was Dolly telling me to stop running her so hard through extreme heat and altitude.
I also realized my good friend Stephanie (a former chef at the Joint in OB, one of the best restaurants in town), who moved to Colorado last year, was just an hour or two away from my campsite. She was awesome enough to let me come and hang at her place for a couple of nights while I got my medications from San Diego (which were running out) sent to me there.
Stephanie lives in the super touristy town of Glenwood Springs. It was lovely, but a little weird. It was super crowded with obvious tourists despite the heat. There’s no law enforcement due to their budget issues, and bears literally prowl around at night going through the trash. Its a really strange mix of rural and urban life.
The altitude was still over 8,000 in Glenwood Springs, which was causing some headaches for me after a day or two. I was looking forward to getting back to a normal elevation again, and then as soon as I crossed into Utah, I remembered.
Wildfires. Smog. I was really enjoying the clear blue skies in the Midwest even if it as hot!
The rest of my drive to San Diego was pretty uneventful, mostly because I was taking it easy. Really, really easy. I got up early to do the bulk of the driving before it got too hot; I never drove faster than 65, especially up hills, and I only did a couple hundred miles per day.
I spent two nights driving through Utah, then stayed with friends in Vegas, then to my stepdad’s in San Bernardino. Dolly didn’t have any problems, but the engine still felt kind of sluggish and loud, so one of the first things I did in San Diego (after I got a taco) was to get a new fuel filter. That helped a little, but a couple of weeks later, an oil change and a new air filter did the trick. She’s running just fine, and I feel good about driving.
It always feels good to be home.
I only planned to be in southern California for a short while; to get my tests done, see friends and family, and head east to my sister’s in Houston and then to my mom’s in Tennessee. I was trying to schedule my scans for the week of September 13, but there wasn’t availability to get a bone scan until October 12.
I was disappointed at first, but then I realized that; one, this gives me more time to spend in California, where it’s beautiful, and where I can see my family some more (and my kitty Janis,…
… who is doing very well at my brother’s house); and two, if I don’t leave until mid-October, then that means Dr. Vlad will let me spend more time out east.
So, barring any unforseen circumstances, I will be leaving California the weekend of the 16th, stopping in Albuquerque, and then spending a couple of weeks in Houston with my sister. Then in November I’ll be headed to my moms house for the holidays, then back to San Diego for my usual tests in January.
For most of the summer of 2021, I have ben traveling the western states. After my brother and I explored Yosemite (see my last post), I spent a couple of weeks in San Diego, hanging out at the local campgrounds, in Ocean Beach, and getting medical tests done. After it was all over, Dr. Vlad told me I was in remission (!), which was a complete shock … I still don’t know how I can go from literally being told I was about to die (and feeling like it as well), to being told there are no signs or symptoms of disease. On one hand, I am ecstatic, and on the other, I don’t want to get too cocky about it, since six months before my back was broken, they were telling me that all of my tests looked great then too. It simply never occurred to me that I would be in remission (or that it was even a possibility), so I can’t say it was a mission.
But hell, yeah, let’s say mission accomplished! Every day is a triumph in this crazy world, and cancer makes it even worse. Any measure of success? I’ll take it.
So… great. I still have cancer, but it’s just not breaking my bones anymore. That’s definitely a plus. But … now what? I gave up most of my stuff. My furbaby lives with my brother. I dumped my boyfriend in California. I live in an RV. I don’t have a home anymore.
Not dying anymore is a great problem to have, but it’s the second time in two years that I have gotten life-changing news. I don’t know how many more of these I can do.
Anyway, after all of the tests and exams and MRIs and medical stuff was done in San Diego, I spent a few more days in southern California.
I went all around: a night in the desert in Murrieta…
… brunch in Long Beach…
… a couple of nights in Ventura with my brother and his family (and my sweet Janis kitty!), and camping at Malibu Creek state park.
It’s a really cute park, and it has some fantastic views, even from my campsite/camper door.
They used to film movies here!
The heat wave started when I was camping with no hookups in Los Angeles county. Luckily I was in a canyon, so I managed to avoid the worst of the heat that week.
The next week, I was in Lee Vining — in the Sierra mountain range near the east entrance to Yosemite.
My stepbrother and that whole side of the family camps there on Fourth of July week every year, and this was my first time hanging with them over the holiday (as you may know, my 4th of July BBQs on the beach in OB were epic).
It was hot up there, but thankfully not as smoky as it got to be later in the month.
My nephews washed Dolly for me (sort of), and we had a great time. We waded in the creek, we grilled tasty snacks, and we saw a bear.
It was a lovely area, even from my stepbrother’s camper (which tries, but of course isn’t as nice as Dolly). We also enjoyed a lovely Fourth fireworks celebration with Indian fry bread tacos and sparklers for the kids.
And my nephew, who is totally adorable … well, he just gets cuter …
After returning to sea level (that always feels so great after time in the mountains, especially when it’s hot, both for me and for Dolly), I spent a night in Lodi wine country …
… and then in the Bay Area …
… both at amazing Harvest Host wineries and breweries. I highly recommend the Ale Industries Brewery in Oakland — you know, a lot of Harvest Hosts people talk smack about urban Hosts (i.e., in cities, as opposed to farms or wineries in the middle of nowhere) because you have to park in parking lots, but personally, I don’t mind. As long as the area is safe I am OK camping there.
I stayed at Ale Industries in Oakland, and I highly recommend their IPA!
Also, I loved being in the Bay Area, even if it was “just” the east bay. The heat and smoke from the many wildfires sparking up everywhere were the mildest on the coast.
I headed further north and stayed at a Harvest Host Winery in the Redwood Valley …
The heat really started to get nasty as I made it north to Santa Ana and stayed overnight at Testa Vineyards in the Redwood Valley. It was 99 degrees while I was sipping my requisite tasters.
It cracked 105 degrees when I was in Humboldt county. I think this was right around the time that the fires in northern California and southern Oregon started to get really bad.
I had reservations at the Red Bluff campground in Mendocino county, but it was another campsite without hookups.
I had managed in Malibu Creek when it was in the 90s, but that day was topping out at 115 and it was a bit too much. My sister offered to put me up in a motel for the night … and just this once, I caved.
This definitely was great – I got to charge all of my devices, have WiFi and cable at the same time, and god knows, I enjoyed that air conditioning – but staying in a motel when it got too hot is not a trend I wanted to start.
I really was excited to see the Redwoods, but the heat was almost unbearable by the time I got there. I traveled through Humboldt county and the Avenue of the Giants, which is just breathtakingly beautiful. The fresh oxygen and cool shade provided by these giants was the only saving grace for the heat during those couple of days.
I had some pleasant surprises, too … People think (or at least, I thought) of “the redwoods” as a single state or national park.
In reality, everything in that part of California is either a state park, a national park, a county park, a conservancy, a wildlife refuge, or a public space of some sort -interspersed with tiny towns and farms and communities in between.
I was there for a few days and I barely saw a fraction of it. I felt sad that I didn’t get to see it in better times.
This feeling – wishing I was there during a less hot and smoky time, and hoping to be able to come back again soon -was a recurring theme for the next several weeks.
Luckily, now that I am in remission, I don’t feel as much like I am on such a severe time crunch. Instead of doing a whirlwind tour of the east coast in 14 days, or hauling ass through wildfires to see the area … well. It’s nice to have more time.
I stayed at a Boondocker’s Welcome host again, two days in the middle of several state and local parks. It was a home with a lovely English garden.
It was also a little bit rainy because I was at sorta low elevation, so that was very welcome indeed. I even gave Dolly a little break and took the bus into Eureka to look around and do some shopping.
I spent a couple of lovely nights in the redwood area, then a very hot night at the foot of Mount Shasta, where the (city of) Weed fire started to get out of hand.
I was in a prime spot for a lovely view but could barely even see that the mountain was there.
I camped that night at the Mt. Shasta Brewing Company, which has great beer and pretzels. As a Harvest Host, they pretty much only need to give you a parking spot, but due to the extreme heat, they were kind enough to let me (pay to) plug in and run my air conditioner overnight. I have a small generator (not the camper one, but it plugs in to recharge and works very well), so I can run a fan; but when it’s over 100 degrees and the whole area is on fire, something stronger is necessary.
After I got to Oregon, the wildfires had basically created their own weather system, so I had to call an audible. I decided to change some of my reservations and stay closer to the coast.
It was definitely the best decision – I went straight west to Tillamook, where I enjoyed fresh oysters on the half-shell…
… and a walk around their adorable downtown.
I had no idea that the Tillamook area was as famous for seafood, especially oysters, as it is for cheese. They have a bunch of little oyster farms everywhere, and the fresh ones are just delicious. The local oyster bar I found was just lovely.
I also did a self-guided tour of the Tillamook cheese factory, …
… where they had some amazing ice cream and cheese dishes …
… definitely try the deep fried cheese curds (with the cheddar ranch dipping sauce) if you ever find yourself around there.
Tillamook was one if my favorite parts of this trip.
I camped out at the Blue Heron cheese factory (along with every other RV on the west coast), I ate a rack of oysters that had just been in the water that morning, I sat on the cow bench in Tillamook, and I ate some of — well, everything at the Tillamook factory.
As I made my way north, I stopped in the coastal towns of Seaside and Astoria, and camped at a Harvest Host in southwestern Washington that’s a lavender farm.
I can’t even describe how fresh and clean it all felt … the sea air and the pine trees and the lavender fields … especially after all of that heat and smoke.
It was even chilly! I needed a hat!
Then I stayed in two different spots near Seattle …
… first on the western shore facing east…
… and then on Anacortes Island, near Deception Pass.
I have good friends on Anacortes island and some distant stepfamily members nearby, so I got to have a nice dinner with family, then a nice evening with my old friends, tasting local beer and eating pizza.
I told them about the amazing oysters I tried in Tillamook, so they hooked me up with some amazing local oysters and showed me how to open them and eat them properly!
The whole area around the islands and Deception Pass is really amazingly beautiful.
My friends are biologists and know all of the amazing spots for hiking, birding crabbing and fishing. I spent a wonderful day exploring the park and the area around it.
I stayed out west as long as I could, and moved a lot of reservations around in order to avoid wildfires. But eventually I had to head east, where I knew the fires – and the heat – were going to get considerably worse.
I was only in Idaho for one night, and in western Montana for a few days. Unfortunately, I didn’t feel like I got the best out of Montana. (This photo, below, was about as clear as it got the entire time I was there – and that day it was almost 100 degrees outside. It sucked.)
Hopefully, I will get to go back, because I basically didn’t see the “big sky” the whole time I was there. Total rip-off.
The whole time I was there, I felt like I was walking around in a campfire. Smoke. Heat.
The sky was hazy and gray when I visited the Garden of One Thousand Buddhas.
Most parts of Glacier National Park were too narrow to fit my RV.
Despite the heat and smoke, everything was packed. It was crowded.
I was disappointed.
It wasn’t all bad, though – I did have some tasty food – one of the Harvest Hosts I stayed at was the East Shore Smokehouse, a great little old-school hunting lodge remade as a new age restaurant. They had this amazing appetizer dish called “Montana hot ends,” which are pork rib tips, smoked and braised and tossed in chili and brown sugar, and served with slaw and ranch dressing.
It’s unlike anything you’ve ever had before.
And then, my chemo drug started to give me problems. I am taking an oral chemotherapy pill, so the side effects aren’t (normally) as bad as the infusions. Most of the time I have a little nausea and a slight headache from these drugs, but that week, perhaps as a result of all of the coughing I was doing due to the wildfires and smoke – I was super nauseated. Most Harvest Hosts don’t let you plug into electricity or water, but one in Montana thankfully allowed it, so I hung out for two days enjoying air conditioning and not driving or doing anything else. It was just what I needed.
The last night I was in western Montana was the calm before the storm I was camping at a brewery – Big Sky Brewing in Missoula – which had a great atmosphere, ridiculously cheap beer, and very nice people.
It was also almost 100 degrees, plus smoke and fire and smog.
I tried to make the best of everything, but the heat was really starring to get to me.
One day … well, it was the worst day. I had a lot of driving to do – nearly six hours according to Google, which always ends up being more in an RV – and I felt sick as soon as I woke up. I tried to fight through it, but in the middle of the morning I threw up (luckily into one of my handy barf bags). It was actually kind of impressive the way I did it while driving. Not an hour later, traffic started to tighten up – an accident had literally just taken place, and I passed emergency vehicles arriving at a gruesome scene. The poor driver had crossed multiple lanes of traffic and hit a hillside; and he was hanging out of his window – either dead or extremely injured – right when I passed. It was terrible.
About an hour after that, the weather was starting to get into the high 90s. I got a call from my friend Jen, who had flown from San Diego into Billings, Montana. We had decided to meet there (hence my long day of driving) to travel through the Dakotas, and then I would drop her off in Minnesota, where she would visit her family and fly back home to San Diego. I was super excited to meet with her, even if it was a long day of driving to get there. I was maybe an hour or two away when she calls me to tell me she landed, and she was headed to a cafe to wait for me. I was coasting down a hill, playing a political audiobook.
Then the engine died. The “check engine” light came on, the gas pedal stopped working, and the brakes felt a little wonky too, since I was headed down a 7% grade with a half-full black tank. It was terrifying. I thought I was going to end up like that poor man I had just seen on the side of the road in that awful accident. I managed to get the RV to stop, and after a lot of back-and-forth with everyone who had an idea about what it might be, I got towed to the nearest repair shop.
It was around 4 p.m. at that point, so they did their best that evening, but by the time the shop closed, they still had no idea what was wrong with the engine. The engine would start up briefly, run noisily for a minute or two, then shake and die. The check engine light wouldn’t flash, and Dolly is a 1996, so the mechanics couldn’t hook it up to their code readers.
Even though they couldn’t figure it out, they let me camp there overnight. Jen was safe in a cool “dude ranch” motel in Billings, while I was plugged in with my a/c blasting in the middle of a repair yard in Livingston. We were both stuck for two nights, but as a stroke of major luck, the two nights we were delayed were also two nights that we got to enjoy the air conditioning when it was almost 100 degrees in Montana. If Dolly hadn’t broken down, we would have been sweating our nips off in a brewery in downtown Billings. And it wasn’t just the heat; the air quality was horrible, and it was hard to breathe sometimes.
After two nights in a repair yard, they managed to finally figure it out. and lo and behold it was the same nonsense that had broken Dolly down in Missouri, last November: rodents! Rodent damage to spark plug wires from the time it was in storage (before I bought it) finally got too hot or whatever and gave out. It was a $12 part. It cost me almost $400, since it took them hours of diagnostics, but it was better than a new engine.
Two days late, I finally picked Jen up in Billings, and we got the heck out of Montana as fast as we could … which, in an RV, is not really fast. I basically drove as fast as Dolly would take us all of the way to Williston, North Dakota. It was out of our way to go to the very south part of South Dakota, but my dear friend Belinda was there for work, and I couldn’t be in the Dakotas and not stop in to see her. We drove for almost 10 hours, but she’s the best friend and was waiting for us with hot showers and a hot bowl of her famous albondigas soup. That’s the type of food that puts the blood back in your veins when you’ve had a hard day!
But after all of that driving, luckily we were back on schedule at that point. So instead of a day with Belinda, we had like two hours in the middle of the night, then we had to get up early and get to Roubaix Lake in South Dakota before nightfall.
Roubaix Lake is really great. There aren’t electrical hookups, but the weather and the fires had cooled off (and we had gotten far enough east) that it wasn’t too hot and uncomfortable outside – it was in the 70s, plus we had a nice lake to jump in if we wanted to.
Of course, we didn’t swim in the lake, because our one full day there was spent in Deadwood and around Mount Rushmore.
Roubaix Lake is about halfway between the Mount Rushmore National Monument and the historic town of Deadwood, which is really cool.
They have an old west shootout in the middle of the street a few times a day, and all of the touristy shops are super cute.
We were in the area about a week before the Sturgis motorcycle rally, so lots of motorcycle riders were starting to congregate.
(But they were preparing for it, so it still looked like “Sons of Anarchy” threw up out there.)
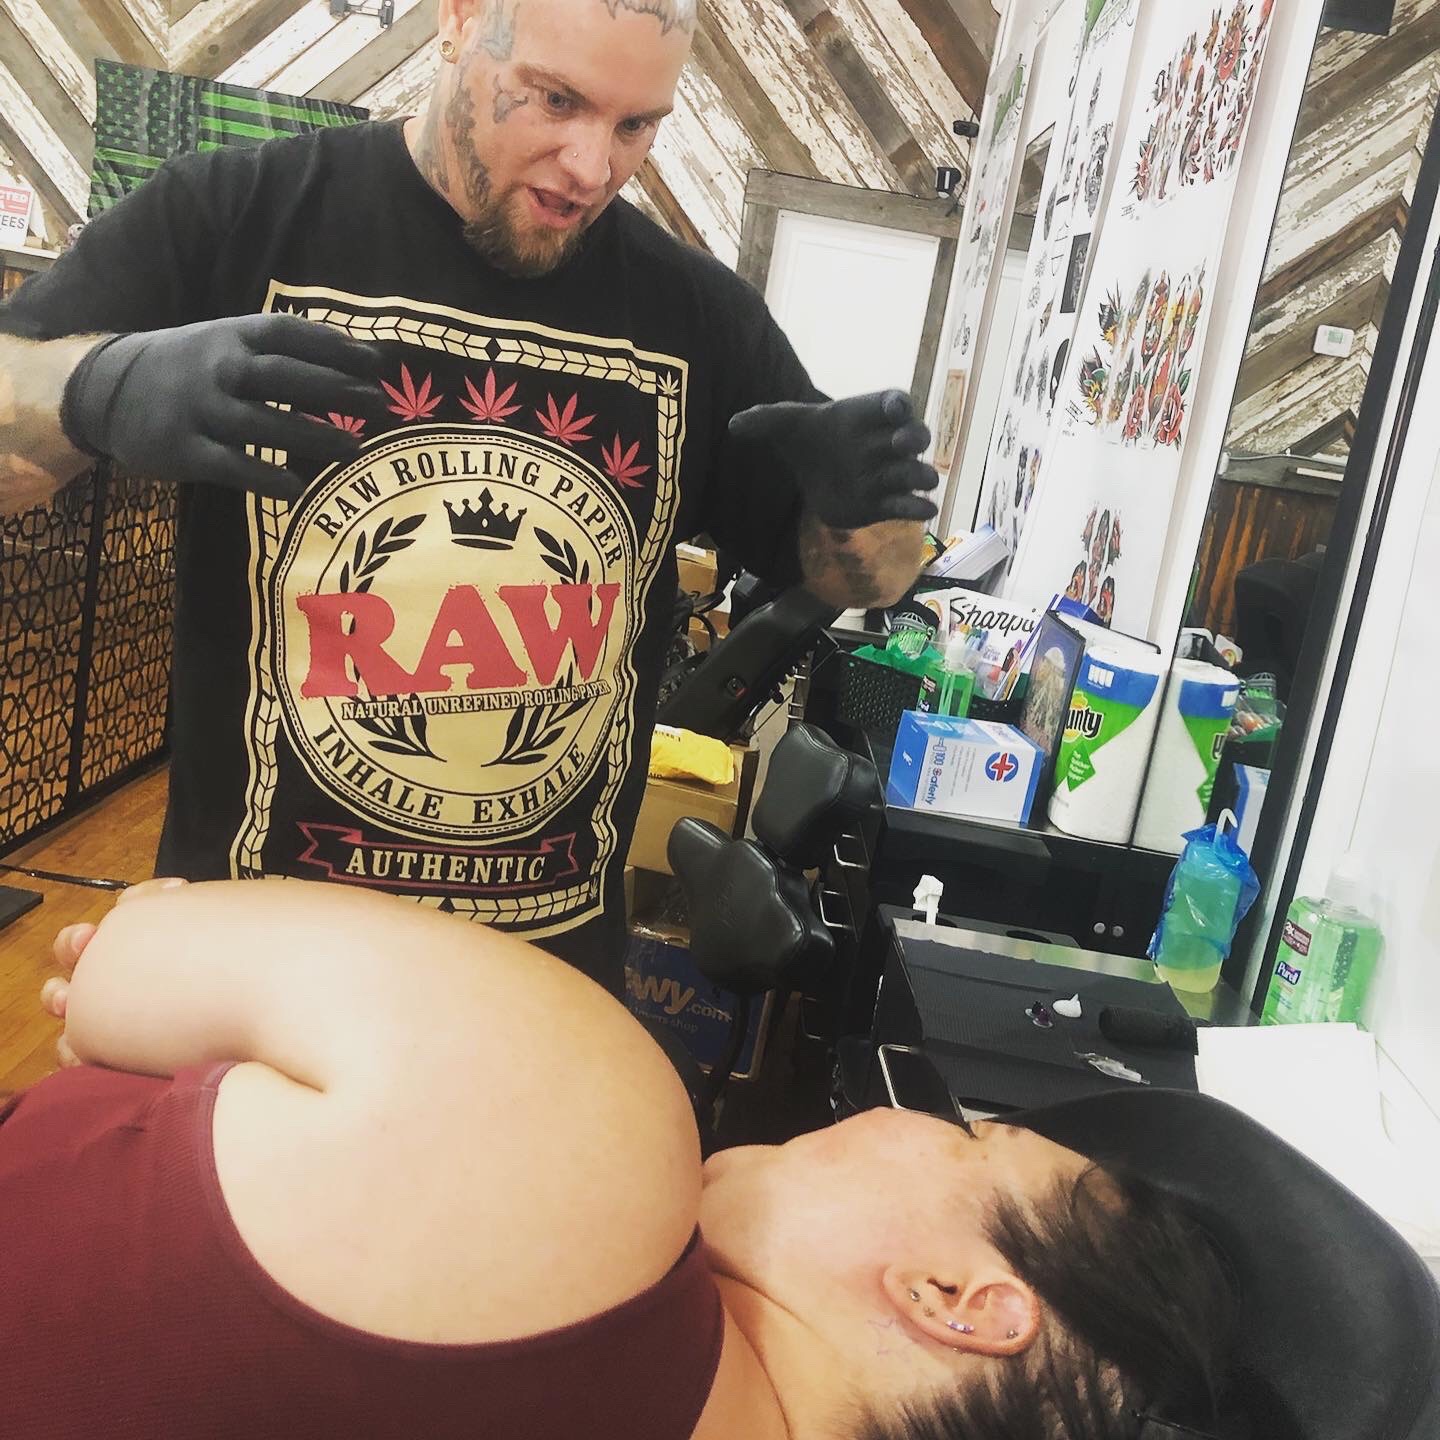
My friend Jen got a tattoo (a lovely purple star, no less) to commemorate our awesome trip together.
I couldn’t join her for a tattoo (even though I would have liked to; it’s a no-no when you’re on chemo), but it was so cool that she got one.
It’s nice that’s it’s to commemorate our fun time instead of some wack “in memoriam” tattoo, too!
After a couple of nights at Roubaix Lake (and a very full day of historic Deadwood and Mount Rushmore), we had another long day of driving, this time as far as we could get into Minnesota. I had to drop Jen off east of Minneapolis in the morning, so we drove all day to get there in time.
We stopped to see the grasslands, and to enjoy lunch at Wall Drug, but most of Jen and I’s time together was spent driving.
Luckily, Dolly is the ultimate luxury vehicle, so we still had a great time. I miss riding around with friends!
Coming soon: Read all about my adventures through the Midwest, including visiting friends in Indiana, Illinois, Wisconsin and Michigan; all of the food I ate in Chicago; my college roommate’s wedding; all of the cheese and beer I consumed in Wisconsin; and of course all of the details from Yellowstone, Grand Tetons, and my trip back home to San Diego. Belinda is (hopefully) going to join me in Wyoming for some national parks explorations, so it should be epic!
Are you enjoying this content? Please support my adventure by donating to my Gofundme here!
Back in April, my brother found a couple of days off and asked me if I was down to go to Yosemite with him. Of course, I was. Because now you have to reserve most national parks online, I set out to reserve us a couple of days. They sell them in three-day sets, $33 plus a processing fee, day-use admission only. There seemed to be plenty of tickets, although they were definitely going fast.
I scored us a pass for mid-June, only having to pay the $2 processing fee due to my America the Beautiful lifetime pass for permanently disabled people. Normally, being disabled is kind of a drag, but it’s definitely cool when you go to national parks!
But first, let me backtrack a little.
Before we went to Yosemite, I went back home to San Diego for a while, to meet some friends, check my mail, see my doctor, etc. I spent a few days in Ocean Beach, and then at Sweetwater (definitely my favorite campground in San Diego).
I had to have a bone scan which is always kind of a drag because they have to find a vein and give me a shot of contrast dye – something that’s painful — and nearly impossible — after I had chemotherapy a few years ago and it wrecked havoc on my veins. I have a chest port, which isn’t a whole lot of fun either, but it’s not as painful as getting multiple sticks in those tiny veins in your hand.
I’m happy to report that my bone scan looked great, and so did my bloodwork, so my doctor is feeing pretty good about letting me go on the road for another couple of months this summer. I have to do a CT scan, an MRI and a few more blood tests first, but at the end of June I will be starting an epic trip around the Pacific Northwest, Idaho, Montana, the Dakotas, Wisconsin and to Michigan for my friend’s wedding on August 21 — then back to San Diego again.
It’s gonna be epic.
Anyway, before I left town I enjoyed a great Memorial Day weekend with my buddy Tully and some new friends. He made this great sign for Dolly, and we had an awesome cookout with a few vaccinated friends,
Remember cookouts? Wow, I had forgotten how cool it was to be around groups of people again!
Back when I was in the Midwest (see last post), my friend Jeanne hooked me up with two jars of this amazing habanero bacon jam. I used part of it on this beautiful tri-tip, and it was just amazing. If you have the means, I highly recommend this Midwest Fresh brand – it was the star of the cookout. The hero of Memorial Day.
I also did some amazing grilling when I was at Sweetwater.
I picked up a few tasty dry rubs and BBQ sauces when I was in Virginia and Nebraska, so my friend and I smoked some chicken wings with sauce and seasonings that were intended for pork, but I figured would be just as good on any kind of white meat.
I was right.
So … on to Yosemite. As I said earlier, we had a three-day day-use hiking pass from Sunday-Tuesday. There are no Harvest Hosts near the park, and all of the campgrounds inside the park are both primitive camping and totally booked for months and months in advance. Some were also closed due to Covid or construction. But I always have a cooler back-up plan. No RV parks or primitive sites for us.
Back at another Harvest Host, other campers told me about a service/app called Boondockers Welcome, which is pretty much the same thing, only they are private homes and properties as opposed to businesses. And whereas Harvest Hosts only let you camp for one night at a time, the hosts on BW determine how long you can stay. Not a day after I purchased my membership, I got an email that they were partnering with Harvest Hosts to presumably be the same service. I am looking forward to seeing how they do that.
We found a Boondockers Welcome host, a lovely older man who has a spot about 15 miles from the south entrance to Yosemite. Our tickets were for Sunday-Tuesday, so we arrived on Saturday night to get an early start on Sunday. We left Dolly parked a the camping spot while we took my brother’s car into the park, I am so glad we did this, because there are a lot of places that Dolly would not have been able to fir inside the park. Even the roads were pretty tight and windy, so I am glad we had something smaller (and lord knows, with better gas mileage) to see the inside of the park, We put about 300 miles on that hybrid Kia engine.
Immediately after entering the south gate is the Mariposa Grove of Giant Sequoia trees.
Remember when I said it’s so much easier to be disabled at national parks? Well, the grove is at the top of a pretty steep hill, so usually there is a shuttle bus that takes you from a lower parking lot to a higher one, after which you can walk up to 7 miles on a trail around the whole grove. If you’re disabled, you get to skip that parking lot, go all the way up the hill, and just walk a mile or so around the trees.
It was so amazing. I am so glad especially for the disabled access … although I have been feeling really good, that would have been too much walking for me, and I pretty much would have been done just after entering the park!
But there wasn’t a whole lot of climbing or hiking after that; it was mostly driving around the park and getting out to explore and take pictures. Most of the rest of our first day was spent driving to Glacier Point and stopping at several points along the way to enjoy the view.
I really loved the trees, but the waterfalls were the most popular and crowded part of the park.
I should mention that all of the guides for Yosemite talk about how crowded and crazy it is during the summer months, but, mostly due to the reservation system, we didn’t have any trouble getting around at all. There might have been a few extra people at the ore popular vista points, but we never had a problem parking or seeing what we wanted to see.
The old town of Wawona was super cute, too — apparently it was where the old pioneers settled the area before it became a park. There was a cool, New England-style covered bridge (the original settlers were from Vermont) and some old buggies.
In all, my brother and I had an amazing time.
We didn’t get to see any bears – real ones, anyway – but we did get to have a little fun with one of the bear signs on the trails. Naturally, they do not encourage anyone to take a selfie with an actual bear, but this was a fun substitute. 🙂
I was feeling a little emotional about the whole thing … the week we were there was the one-year anniversary of when I got out of the hospital with a broken back. I was remembering that hellish time, and I was marveling at how far I have come – mentally, physically, emotionally, and in my new capacity as a world traveler – in just a year.
Our Boondockers Welcome host, he shared with us, has very recently lost his wife – to a stage 4 diagnosis at the same time I got mine. What gives me the right to enjoy myself and be nearly pain-free while this sweet man has lost his companion of decades? It didn’t seem fair.
It doesn’t happen often, but every once in a while I need to have a good cry and thank the universe for what I have.
COMING SOON: at the end of June, I am doing a little more California camping – Malibu Creek, Lee Vining around the 4th and then north to Lodi, the Bay Area, the Redwood National Park, then I’m continuing through Oregon and Washington, Idaho, Montana (some more national parks), the Dakotas, the Badlands, Mount Rushmore, Minnesota, Wisconsin and Michigan. Then I’ll have to haul ass back to San Diego for more doctor’s visits. I think, like my east coast swing, I can do this in a little over two months and see everything I want to see!
Are you enjoying this content? Please support my adventure by donating to my Gofundme here!
After I left Ohio, and my lovely evening in Star City, I headed to Chicago. More accurately, since I have heard Chicago was not a very RV-friendly place, I headed to a Harvest Host brewery in St. Charles.
It was a long day of driving – in retrospect, I could have taken more time, but I was kinda paranoid about not having enough time to get through the entire country and back to San Diego in time for my scheduled tests – but I still stopped in Fort Wayne to meet up with another old friend from high school. It was a super fast reunion, but it was great!
The rest of the drive to the Riverlands Brewing Company was pretty busy and stop-and-go traffic for miles, but it felt great to relax with a nice beer when I finally arrived. The brewery was a chill place to park overnight and was a great local spot full of people. I also got a delivery of some amazing Chicago-style deep dish pizza, keeping with my tradition of eating totally on brand food for the region. This was full of pepperoni, mushrooms, an ricotta cheese, and of course it was upside-down and practically a casserole.
The next day I drive most of the way through Iowa. I was much more green and lush than I expected –I had always heard that Iowa and Nebraska were very dry and flat, with mostly farmland, but they were both very green and beautiful. It was a lovely drive, and I ended up the next night at Doe’s and Diva’s Dairy Farm – another great Harvest Host in western Iowa.
On the way, I stopped at the world’s largest truck stop in Iowa.
Please check back again later for another blog post entirely devoted to the magic that is the all-American truck stop.
The food.
The parking.
The one-stop-shopping.
The showers.
(Coming soon.)
So green! Anyway, the dairy had goats and sheep, and there was cheese available for sampling, but not enough for sale. Fortunately I was able to snag a bottle of their amazing goat milk lotion!
The next night I was at an adorable county park in the middle of Nebraska – one of the few nights on my trip that I didn’t stay at a Harvest Host or with a friend or family member. It was a simple process to put cash in an envelope and pick an open spot, which I liked, and then it was a lovely relaxing and quiet evening, which I loved.
After Chicago, I pretty much stayed on Interstate 80 west the whole way into California … going through Iowa, Nebraska, southern Wyoming, the northern tip of Utah, and through Reno and Lake Tahoe straight into Sacramento. Right at the border of Nebraska and Wyoming on Interstate 80 is Fort Cody, which is a tourist trap/souvenir shop, but also a wild west show and … I don’t even know what is up with the mannequins on the roof.
It was certainly interesting, though.
In Wyoming, I drove through Cheyenne, and checked out some amazing murals. I’ve always loved street art, and I have seen some really amazing examples on this trip; in urban areas like Long Island, in areas so remote they feel abandoned, like Navajo country near the Four Corners, and places like this town square in Wyoming.
I camped for the next two nights at a Wyoming state park – Curt Gowdy park in between Cheyenne and Laramie.
It was a little gloomy and drizzly, but I had been making excellent time crossing the Midwest so I thought I could chill for a couple of nights and relax before I started the last slog back to California.
I took some walks, I enjoyed some home-cooked (in the RV) food, and I read some magazines, Mostly I just relaxed and enjoyed the view.
The campground wasn’t very busy, and it was another honor system pay process ($80 for two nights including electricity and this view!), so I was a very happy camper.
This was one of my favorite views from the camper door of my whole adventure so far.
The 80 only goes through a small part of Utah, which is pretty much always gorgeous. Like, everywhere. I went through Salt Lake City and even the most urban part of the state is really pretty.
And the salt flats are right off of the freeway, so – even tough I am too chicken to drive Dolly over all that salt – I stopped to enjoy the view for a minute.
There’s even street art on the freeway, like this amazing (and giant) art installation. Whomever thought of a giant sculpture in the middle of a salt flat that’s already naturally beautiful … it’s just incredible.
Continuing through Nevada, I stopped at another unique and only-in-the-west art installation – Thunder Mountain Monument. It’s made of trash and reused items, and it’s meant to symbolize the plight of Native Americans when the white settlers invaded their homes.
It’s right off of the freeway, so you can do it in a quick stop. And it’s definitely worth it.
And, it’s not not a bit creepy. There’s a great article in the Smithsonian about Thunder Mountain here.
I stopped at a truck stop in rural Nevada that night, there not being any friends or campgrounds or Harvest Hosts (or, really, much of anything except a place to park), and the next night I was at the lovely Gold Hill Hotel and Saloon near Carson City. I made the reservation online without doing much (or any) research into the area; it looked like a cool place and it was close to the route I was taking,
The drive up there seemed a little treacherous for an RV; there was literally a sign about a mile before the inn that says “no RVs or trucks past this point.” I kept going, reluctantly, and the owner later told me that just past the hotel there is a hairpin turn on a major grade so trucks often get stuck there.
Most Harvest Hosts are wineries or farms, so an inn with a bar and restaurant is unusual, I loved the feel of the whole place; it’s really old and Mark Twain used to drink there. The food could definitely have been better, but the service and the views were impeccable.
And I am really glad I enjoyed a hearty and warm meal, complete with a cocktail, because this is what it looked like when I went back out to my RV.
Frankly, I had woken up at the truck stop that morning to rain and sleet, and now that it was snowing, I was kind of irritated … perfect weather all the way through New England and now the weather starts acting up? In Nevada? It was messed up.
The crappy weather continued all through Tahoe – I made it just fine, but it was really nerve-wracking having to deal with freezing temps, snow, sleet, traffic, and mountains all at the same time. But there’s no other way to get into California from Nevada without hitting some mountains, so I made the best of it.
I stayed at another unique Harvest Host on the California side of Lake Tahoe; a lovely little Lutheran church with a big parking lot and a view of the lake. There was enough of a break in the snow to get a nice BBQ lunch nearby.
The next morning, I drove down from the Sierras into Sacramento, and it was glorious. I was super nervous all night about the impending snow and the steep drive down (and driving through the goddamn Donner Pass didn’t help my mindset very much), and frankly, I was just happy to be at sea level again.
My Harvest Host in Lodi was m2 Wines, which had really delicious wine (especially after the sucky wine out east) and amazing views, I had a sweet spot with a view of the vineyard from my camper!
My next stops were in San Jose to met another high school friend – she was actually planning to buy an RV and hit the road herself (with her whole family), so it was great to see her, meet her kids and husband (whom I had only seen online), and discuss RVing in 20121.
That night I was at my great-aunt’s house in Santa Cruz. We took a lovely walk along the coast with the gorgeous views, including a cool lighthouse. I really love Santa Cruz.
The trip down Highway 101 was pretty uneventful but it was really pretty, including great art I love so much … you can see it from the highway!
That night, I picked another Harvest Host near Paso Robles, but I went to an olive oil company instead of a winery.
43 Ranch Olive Oil is a really old, family-operated olive farm and oil press. They grow several varieties and make them into oil, and they also press oils for other olive producers in the area. I and some other Harvest Host guests were able to enjoy a tour of the press, learn how olive oil is made, and try some samples. It was great.
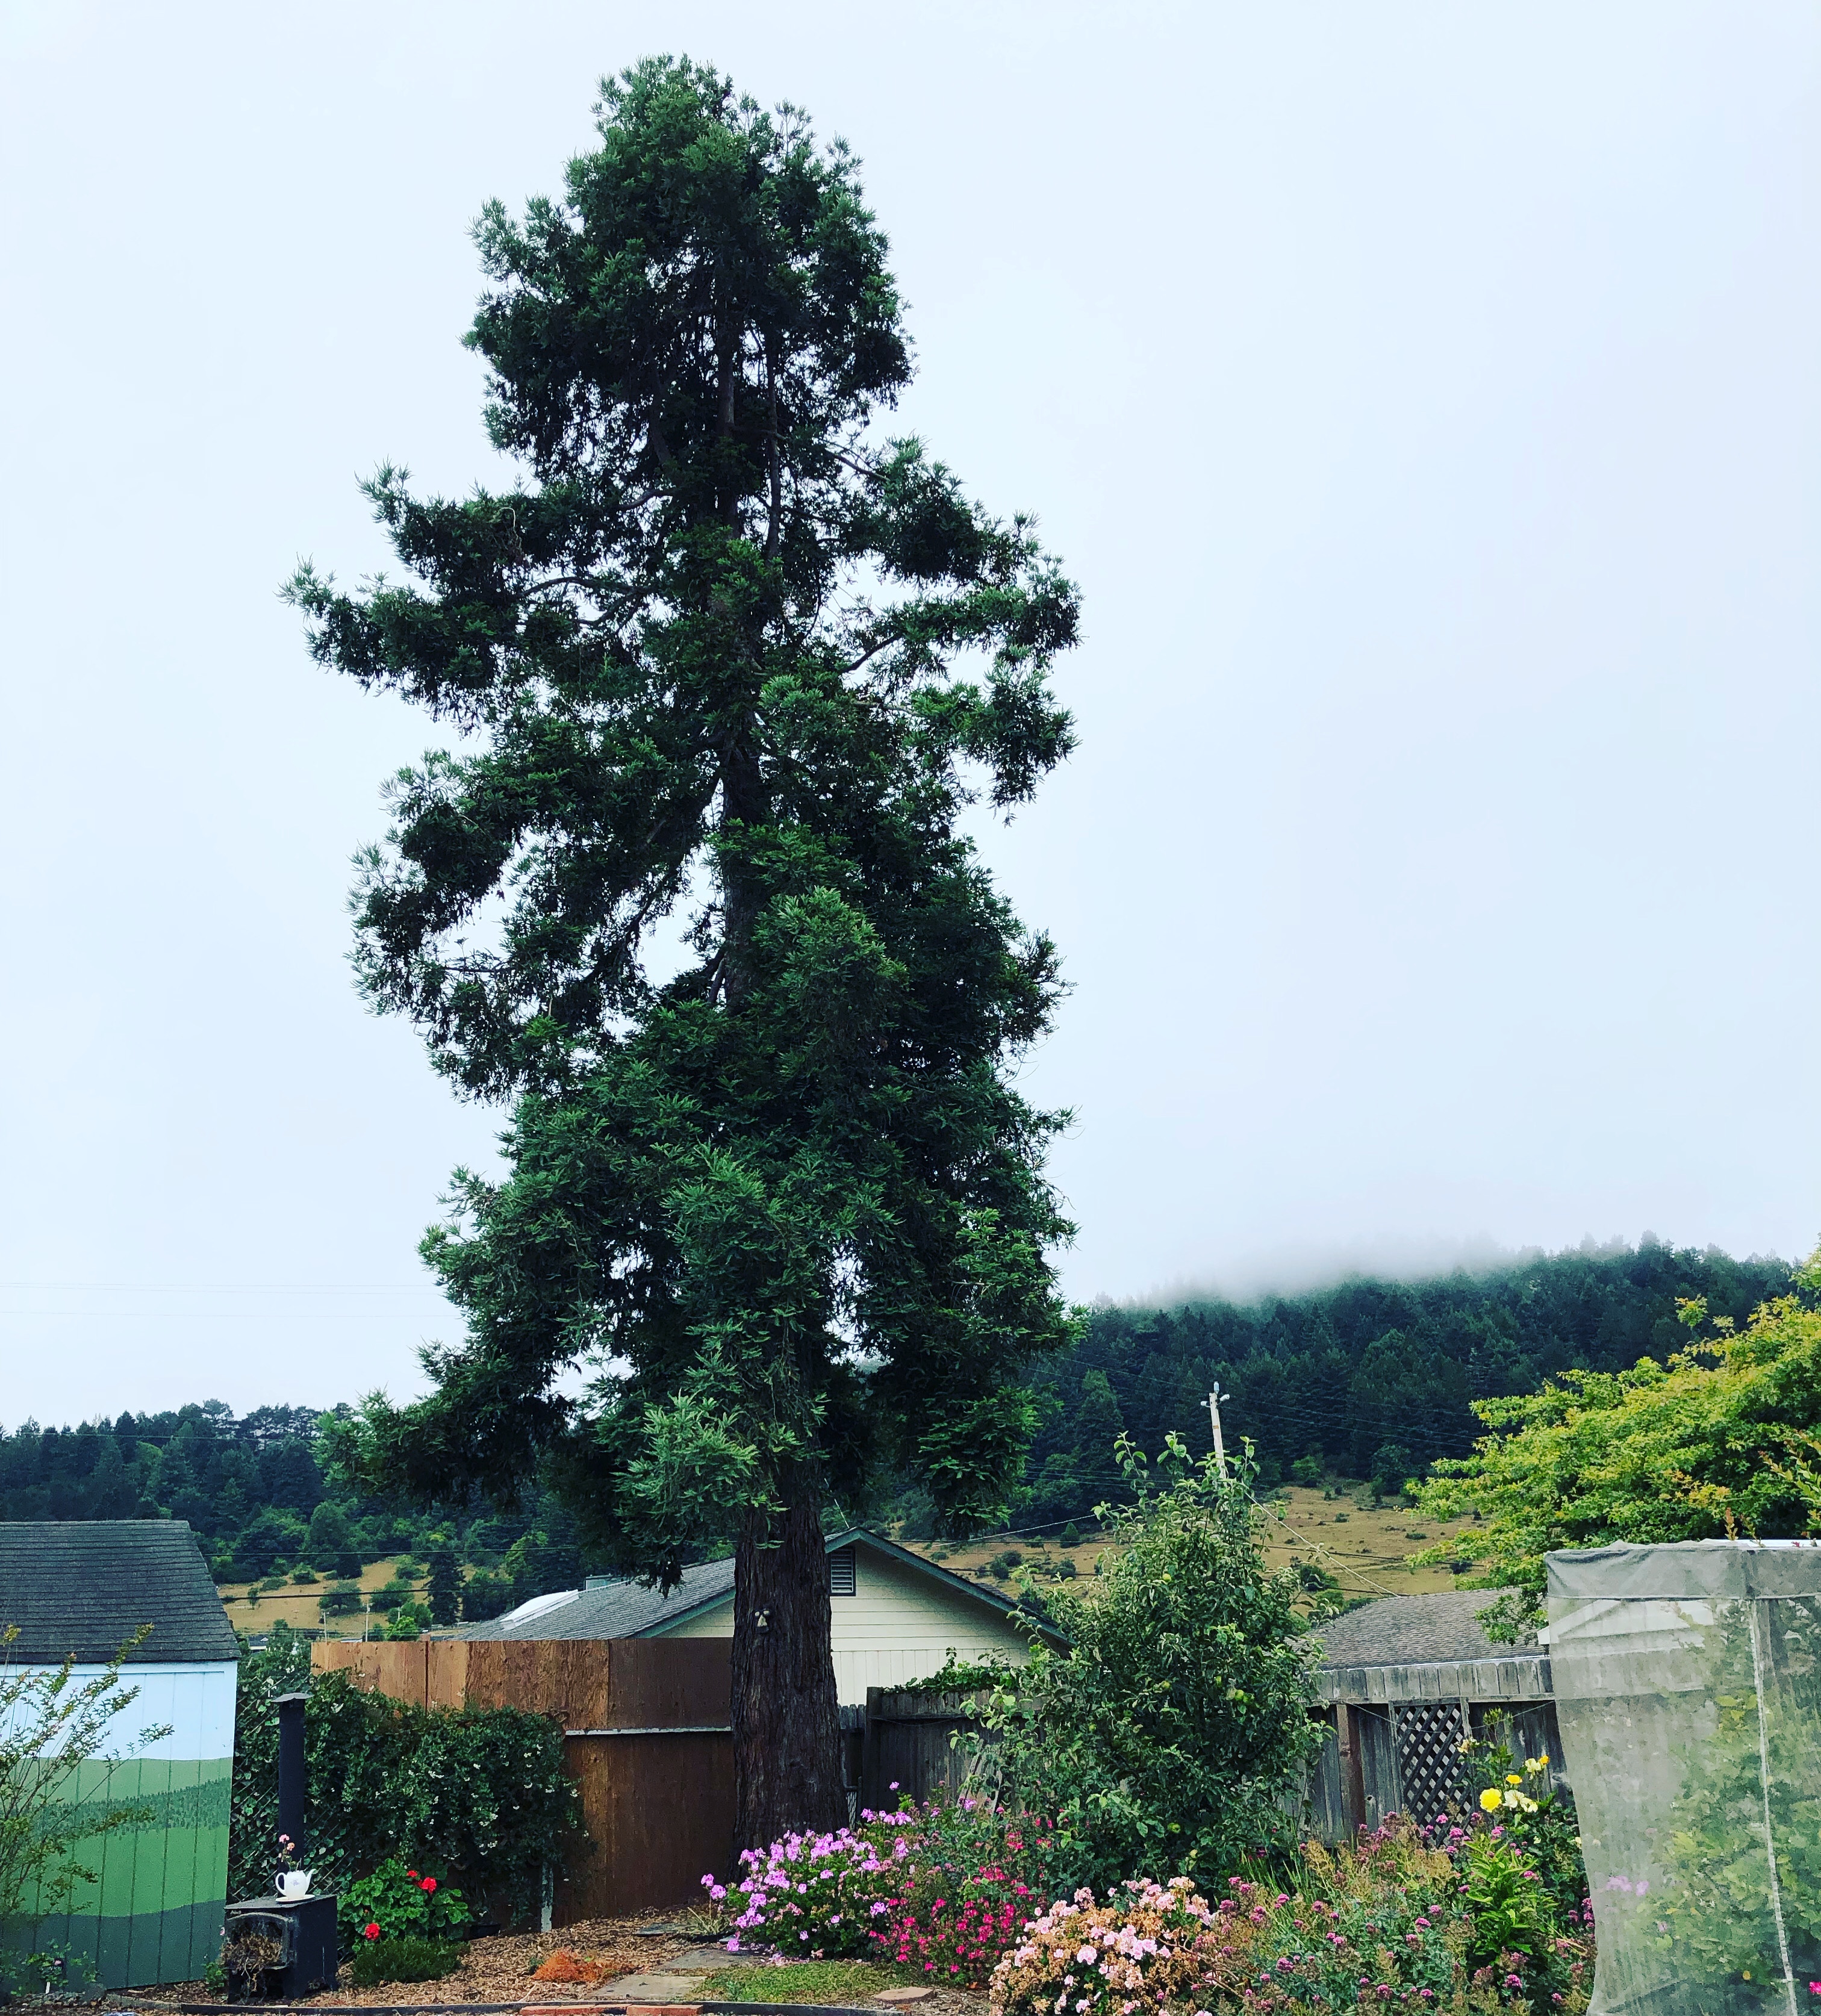
It was also a lovely view … the area around SLO and Paso Robles is always lovely, but I had a great parking spot under this big tree and it was very nice and peaceful.
The next night was lovely too — just a short drive to Morro Bay and the coast. That night I stayed at a golf course Harvest Host – the Sea Pines Golf Resort.
Golf courses are included in the premium Harvest Hosts package ($99 a year when I signed up, I think it’s about $120 now), but the majority of them ask you to book a tee time and play golf when you make your reservations. Luckily, this beautiful place didn’t require me to play golf (which I do not), so I supported my hosts by drinking and having a lovely meal in their restaurant.
My last Harvest Host before I got back to San Diego was another unique one – an antique store in Whittier. It’s the only Harvest Host in the Los Angeles area, and compared to the two previous nights in an olive oil farm and a seaside golf course, it was … different.
It was a parking lot. In Whittier.
Despite being near a busy street, it was relatively quiet at night, and I really enjoyed walking around the enormous antique store. It took up like 4 levels and was chock full of all of the coolest stuff you can imagine. I didn’t have a lot of time in there before thy closed, so I bought this.
Once I was back in San Diego, I stayed in my old neighborhood of Ocean Beach for a while, then checked into Sweetwater campground for a few days while I had some tests and doctor’s visits.
Sorry to be so behind … I haven’t even gotten to the fun stuff I did in San Diego around Memorial Day. I still have so much to tell you all about the last couple of weeks in San Diego, San Bernardino, Los Angeles and Yosemite! Stay tuned for more very soon.
Are you enjoying this content? Please support my adventure by donating to my Gofundme here!
What an incredible time this adventure has been so far! This has been everything I could have hoped for.
After I left my mom’s house in east Tennessee, I went straight north to Virginia.
Of course, barely a week after there had been freezing rain, it was in the high 80s with insane humidity. Southwestern Virginia is really beautiful, although the landscape is pretty much the same as Tennessee.
I visited a cool monument to Booker T. Washington outside of Roanoke…
I visited a cool monument to Booker T. Washington outside of Roanoke, and camped that night at a state park. Smith Mountain Lake State Park is one where locals go to fish and boat all year long, but I was only there for one night. I met a few people, I enjoyed the air conditioning in my RV (that sweltering Virginia humidity is no joke), and when the sun went down I built a campfire.
I have been full-time in my RV since Halloween (except for a couple of weeks at my mom’s house over the holidays), and I have never stayed a single night in an RV park. I don’t know about you, but I have never seen an RV park that looked like a cool place to hang out. Most are full of kids, which I do not care for, and very few are cheaper than a county or state park. Plus, who would you rather give your money to, a parks agency that just got another round of budget cuts, who offers a safe and fun and cool place to camp; or an RV park full of screaming kids? Seems like an easy choice to me.
Other than a few parks and a few friends’ houses, I stayed at a bunch of Harvest Hosts. If you are new to this blog, you may not know about HH … they’re for RV owners; you pay a set annual fee (less than $100 unless you’re premium) and you can stay at several thousand hosts across the country.
Some are wineries (hence the name), some are farms or distilleries or golf courses, and some are just places of interest, like a museum or an inn or a cool store. It is also requested that you support your host by buying whatever they have for sale (a bottle of wine or a tee time, etc.), so you get the extra benefit of supporting a small business in a pandemic as well. My second night in Virginia was at Hubs, a Harvest Host that is a company store for a peanut farm — so as you can imagine, I walked out of there with a few peanuts.
I also feel like I did a great job of sticking with Harvest Hosts that were on-brand for that region. As you’ll see later, I stayed at a dairy farm in Iowa, a cranberry bog in Cape Cod … and in Maryland, I was at a crab restaurant.
Ocean Odyssey was amazing. No frills or anything fancy, but the crab was so flavorful and so well-prepared, I can’t even describe it. I had my crab cake pan-fried (as opposed to deep-fried, upon the recommendation of my server), which was almost all crab meat and spices, very little breading, and served with an array of sauces, including an impeccable homemade tartar sauce. I also got a cheesy crab dip.
And although it was rainy and windy that night, it was a really nice evening.
(I try to take a picture of my view from my camper door from most, if not all, of the places I stay.) The eastern shore is really amazing in terms of beauty, wildlife, and history. Within walking distance of my camping spot at Ocean Odyssey is a river port with a visitor’s center, artwork and murals, and beautiful views.
The eastern shore is also where Harriet Tubman lived and helped rescue thousands from slavery. There is a really cool museum and learning center nearby. I really wanted to get one of these as a hood ornament for Dolly.
I also thought the Chesapeake Bay was super cool … I didn’t realize before that the bay was crossed by not a tunnel or a bridge but a series of bridges and tunnels that span dozens of miles over sandy beaches and the deep bay between Virginia and Maryland.
It was a really interesting drive that day, especially. Next time I do this trip, I am taking someone else with me (and washing my damn windows) so we can get a lot of (much better) photos.
I got my first Covid vaccine shot in April in San Diego, and I was eligible for my booster when I was going through the DC area, so I left Maryland early the next morning, I got my booster shot, and went to my next Harvest Host. I wanted to spend some time in Washington DC, so I picked Port City Brewing in Alexandria, Virginia, which is actually accessible to downtown DC by subway. I planned to take an Uber into town and either take the Metro back or meet some friends.
It turned out, I did all of those things! After I parked Dolly at the brewery, I took an Uber to the iconic Ben’s Chili Bowl, where I had an awesome half-smoke and some fries.
Then I took the Metro to the Smithsonian, because it was a gorgeous spring day and I had never seen the new MLK statue (the last time I was in DC was for a college internship in 1999). I think everyone in the DC area had the same brilliant idea as I did, since people were starting to get vaccinated, things were starting to open up on a limited basis, and it was just a fantastically gorgeous day.
I was really glad I carbed up at Ben’s, because I did a lot of walking that day around the Washington Monument and the mall.
I got to check a couple more national monuments and parks off of my list that day as well, so I think I earned this new sticker.
I also met up with a friend (she’s actually a sister-in-law of another friend, but we had only met online previously), and then ANOTHER friend from high school (who I literally had not seen since graduation) picked me up and took me back to the brewery where I was camping; so I was able to relax with her and have a couple of beers while we caught up.
I would say that it was an extremely eventful day, but most of my days on the east coast were similarly packed.
The next day I was off to Delaware, staying at another Harvest Host brewery called Midnight Oil Brewing.
This one had kombucha as well as beer, which I appreciated, and it wasn’t as crazy packed as the one in Alexandria had been. I even ordered some local Chinese food that was pretty awesome.
You know I will always find a way to eat well, even when traveling, but it’s hard sometimes to get good ethnic food on the road. I can always pretty much assume that pizza, BBQ, burgers, fried chicken, etc., will always be good if you go to a good restaurant; but Mexican, Thai, Indian, Chinese – anything ethnic – it’s best to get it on recommendation from a local instead of winging it.
Speaking of food …
The next day I was in Jersey, seeing my dear friend Nichelina for the first time since we got back from Dolly’s maiden voyage back in December. I parked at her house in Ocean City, New Jersey, and she took me to all the places and we ate all of the things.
But first, I went by myself to the Ocean City boardwalk. And it was abandoned.
Almost every shop closed. Almost no people.
I’ve never seen anything before in my life like a beach town that is closed for the season. This isn’t a thing we have on the west coast. I got myself a frozen custard (which was delish) and some souvenirs (because of course those stores were open, haha), and took a walk on the boardwalk, but it felt weird.
The next day, Nichelina took me to Philadelphia, so I was able to have the most incredible foodie day! Our first stop was the Reading Terminal Market, where they have tiny little booths of craft and artisanal foods. I got some Amish goat cheese and duck pate, as well as some fancy chocolate.
Because Nichelina drives like a crazy person, I got a literal whirlwind tour of Philly. I flew past the Love statue, the courthouse and the Liberty Bell. I managed to jump out of the car for thirty seconds or so to take a selfie in front of the Rocky statue.
Luckily they moved the Rocky statue so you don’t have to climb a bunch of stairs to get to it. I definitely would not have had time!
You may or may not know about the Cheesesteak Corner in Philly. It’s literally a street corner where two competing cheesesteak joints have been rivals for decades. Everyone in Philly has an opinion about Pat’s vs. Geno’s. Being a west coast girl, I did not have an opinion, but Nichelina insisted (in a characteristically quasi-violent way) that we were going to Pat’s or nothing.
So we went to Pat’s.
And I’m not mad about it; it was incredible. I learned how to order it properly so I didn’t look stupid, and it was delicious.
Next, we went to Termini Brothers, a century-old bakery known for handmade cannoli and other sweets. I got a cool video of the expert cannoli-stuffer filling it with one of three tasty fillings:
I was also told (by another friend from PA) to go to John’s for a roast pork sandwich, but John’s was closed due to being out of bread. I almost witnessed some acts of violence by other patrons when they realized they couldn’t get a sandwich, but Nichelina suggested that we go to Tony Luke’s instead for a roast pork. It was really amazing. The bread was soft and chewy, the pork was super tender and spicy, and the cheese was the perfect topper.
Then, because I guess we hadn’t eaten enough, we stopped for a slice at Lorenzo’s on the way out of Philly.
Even splitting everything halfway with Nichelina, I was more stuffed than I have ever been in my life. It was a rough night.
The next day, we went to Atlantic City, which was also closed for the season (it wasn’t quite Mother’s Day yet). I still think it’s weird and kinda eerie to be in a beach town – one with gambling and entertainment, no less – that is mostly closed and almost totally abandoned except for hardcore gamblers and locals.
I guess since it’s off-season they felt Ok about treating us like crap at the restaurant … the Gordon Ramsay spot inside of Caesar’s Palace was pretty much empty and the Buffalo Cauliflower was rad, but the service was just awful. It’s the first time I haven’t tipped over 20% since the pandemic started. It was especially a disappointment after hearing good things about the spot.
Most of New Jersey is wooded and then it’s the beach. Frankly, if you didn’t know Jersey was a blue state, you’d swear you were in the South – there are absurd liquor laws, weird one-way roads, and some rural homes that would be similar to ones found in Mississippi or Louisiana.
I got to meet up with two different friends of mine from college, to show them around Dolly and catch up for a few minutes. This lady was my editor on the student newspaper in college for two years and we haven’t seen each other for at least 3 years.
Seeing old friends – some for the first time in decades – has been one of the best parts of this adventure. And they love seeing Dolly!
Next, I went north to Long Island, but from Jersey I had to go through New York City. This would not have been as strange or anxiety-producing or crazy if I had been in a normal-sized car, but NYC has a lot of bridges that are old and cross over major expressways, so for example if your vehicle is over 10 feet in height, you can’t go down certain streets. Dolly is about 11 feet and 5-6 inches, so I go with 11’7″ to be safe.
Of course, they can’t just have a sign that says a low bridge is ahead, that would be too easy. I saw a flashing sign on the side of the road that said “you are over height, exit now.” This was the third or fourth time I had had to jump off of the expressway, and rush hour in New York isn’t the best time to do that. So I ended up pulling over and downloading a new app specifically for RVs and trucks so I could take a route that didn’t knock Dolly’s block off.
Between a new route and all of the stops, my three-hour drive became almost 7, so I was glad for a quiet parking lot outside of a bagel shop that night. The Bagel Cafe was another Harvest Host, and one I thought would be cool for the full Long Island experience.
As I said, it seemed like the landscape didn’t change much from Tennessee all the way up through the eastern shore and Virginia to Jersey. All the trees and highways look the same until you’re at the shore. The architecture changes a lot, though … you go quickly from the Appalachian-style brick farmhouses to the clapboard, New England-style farmhouses.
Then, when you really get to New England, everything looks different.
I stuck to the expressways, mostly because they were the only roads recommended by my new driving app. I’m pretty sure all of the other roads had too many low bridges and quaint little hairpin turns for my RV to pass over safely, so it told me to stay on the big, main roads. The only weird thing about that is, at least in the spring, you can drive down the expressway and all you see on the side of the road are trees. Tons of trees. Every color. Some bare ones but just miles and miles of trees. And there are signs on the road telling you that there are restaurants and hotels and gas stations and cities if you exit here, but you can’t see any of it from the road. It’s pretty surreal.
Then, you’ll be driving down the road enjoying all of the various shades of all of these trees and gardens and farms, and all of a sudden, BOOM. PINK. Dogwoods in bloom in every shade of pink, including some I had previously thought couldnt occur in nature. It was really magnificent. I am so glad I managed to pick the perfect time to be on the east coast – not too crowded, not too hot, not too cold. Next time I just need to spend more time there.
I have a few friends in Massachusetts and Rhode Island – two states, which, let’s face it, should just be the same damn state. I will never again be impressed when someone refers to anything as “the size of Rhode Island,” because it is very, very small. I am used to living in a big state, which means when you say something like “I am crossing state lines,” it means something. In New England everything is so small it makes it seem farther away than it really is. In one day, I drove through Connecticut and Massachusetts, then through Rhode Island and into Massachusetts again. And I barely drove three hours. It takes some getting used to.
I visited Cape Cod, which was really beautiful.
I had a lobster roll and camped at a Harvest Host that’s an actual cranberry bog, so I definitely got the full immersive experience. The bog wasn’t blooming any berries at the time, but as you can see the weather was perfect.
I got to stop the next night to see some friends in Easthampton – we used to be neighbors in Ocean Beach and now they’re married with a 7-year-old kid, so it was a really great visit.
After a fun night, we went to a beautifully fragrant apple and peach orchard/ sculpture garden nearby, which was super awesome …
… then on the way back we spotted some roadside asparagus, so I couldn’t resist. It was some really delicious asparagus, too.
Honor system, side of the road.
Whatta country.
After that I had to head west, but it took a whole day of driving just to get through the Catskills and the Hudson River valley to eastern Pennsylvania.
Normally I don’t drive more than 5 hours if I can help it, but this was just under 6 hours … and it was spectacularly beautiful.
I headed to a Harvest Host called Stone Lake Inn, an adorably quaint winery and inn that’s also used as a wedding venue, etc. The wine was not the best, but the staff was very kind and the scenery was unbeatable.
Pennsylvania is a big state so it took a while to get through it. The next night I was in western Pennsylvania, at a farm near the continental divide. I was given the option of parking near a barn with the other equipment, or at the top of a (kinda muddy) hill where they usually grow sunflowers. I guess you know which one I picked.
I got Dolly’s undercarriage a bit dirty, but had some amazing views all night and the next morning at the top of this hill.
The next day I drove through the rest of Pennsylvania, the tiny sliver of West Virginia (I think it’s like 17 miles) that sticks up in between Ohio and Pennsylvania, and into Ohio.
I made it most of the way through the state, to Miamisburg, aka Star City (read here to find out how it got that cool name), and to a Harvest Host called Star City Brewing.
I really loved this town, and not just because of all the stars.
The people were super friendly, the beer was really good, and there were great restaurants. I parked Dolly at the brewing company and went down the street for some BBQ, then came back for a couple of beers. I met some really fun people (again, the mask mandates were starting to ease as more people go vaccinated, so it was especially cool to be drinking at a bar with people).
Stay tuned for the next leg of this trip, where I make it the rest of the way through the Midwest and western states back to California. There’s a lot more to tell! And don’t forget to follow along on social media!
Are you enjoying this content? Please support my adventure by donating to my Gofundme here!
After two days in the shop and $2,200, I finally got Dolly back. I was supposed to leave on a Wednesday, and it was really now going to be Friday. But, I got new brakes and new shocks, both of which were sorely needed, and I got it handled before I hit the road, and by a mechanic I trust. If I had left San Diego with my brakes in the state they were in, I wouldn’t have made it far — probably somewhere on a desert mountain. Let’s not think about it.
Anyway, despite the hit to my bank account – I get a disability check and Social Security Disability payments, so I am not destitute, but I was feeling like all of the “cushion” I previously had, had just evaporated – I was super excited to finally hit the road.
Belinda joined me for this leg of the adventure as well, because she was going back to Louisiana. She works for a roofing contractor and travels to where the natural disasters cause the most problems, so she needed to pack up to move out of state. In the meantime, we enjoyed another adventure together!
The day, we drove through the beautiful Los Padres National Forest, and I have to say, Dolly’s new brakes did beautifully on those steep hills and forest mountain roads.
No matter how much I travel through California, I am always amazed at its diversity of beauty. Not just its beauty. The different types of breathtaking beauty. Everywhere.
The host generously allowed us to come after hours, but we didn’t go inside or buy anything. We enjoyed a nice sunset and hit the road early the next day, so we could go to our favorite places in Paso Robles before we left the state.
Belinda, of course, insisted that we go back to the incomparable Il Cortile restaurant, and thank goodness she paid because my wallet was hurting after that brake job. But the only reservation we could get that night was for 8:30 p.m. (way late to eat if we wanted to hit the road to Vegas early in the morning), and we couldn’t get into the tasting room at our favorite winery, Chronic Cellars, so we decided to stay an extra night in Paso. It was lovely and exactly what we needed to steel our spirits for a long drive through the desert and plains for the next several days.
Our first night in Paso Robles was actually spent at a winery in San Miguel, which is just slightly north of Paso. The Four Sisters winery is pretty nice, if you love the whole sweeping vistas and lush vineyards and jaw-dropping views sort of thing.
We simply couldn’t rush drinking here.
So we were nice and buzzed and relaxed when we headed to Il Cortile, where again, just like in February, Belinda and I shared appetizers and a pasta dish and got huge entrees. I wanted the lamb rack, but they were sold out, so I was forced to eat the veal shank (I know right).
But the real star of the meal was the ravioli … it was stuffed with corn, so it almost tasted like a tamale, and the creamy mint sauce was studded with bits of mushrooms and bacon, but somehow the whole dish still felt perfectly light and almost airy. It was incredible.
The next night we went back to Tobin James (where we also parked on the Harvest Host program when we were there in February). They have an enormous lot and they are right off of the highway that goes to Barstow, so it was perfect. After we checked in, we took an Uber to Chronic Cellars and enjoyed a glass of wine and bought some of their incredibly cool merchandise, as well as an enormous amount of wine.
We also were advised to check out the Vines on the Mary Crest, another cool winery that’s literally across the street from Chronic. They had a tasting room that was still open at 4 p.m. (unlike Chronic, who closes early), and all of their wines are named after cool rock songs since the vintner/ co-owner Victor used to be a sound engineer for all of the greats.
We really loved this place, and we looooove Victor and his wife Jennifer. They’re both super friendly and into good music and good wine. I mean, their wine club includes concerts and free CDs! After we enjoyed ourselves and bought a bunch of wine, Victor not only recommended a lovely dinner spot, but he drove us there when the Uber didn’t show up. I don’t know if that’s included in the wine club, but I highly recommend their wines and their family.
The dinner he recommended that night was almost better than the Il Cortile dinner the night before… we went to The Hatch, and had prime rib and this appetizer of smoked mushrooms and cream.
They also have an award-winning cocktail artist who designed all of their signature drinks.
I had an Old Fashioned and it was killer.
So after all of that, as you can imagine, we slept like babies that night and were on the road at 7 a.m. the next morning. We headed towards Vegas and stayed with our friends there (we parked in their apartment’s parking lot), and again left early. It’s a pretty unremarkable drive, so luckily we had some good music to keep us alert.
The next night we were in Page, Arizona, this time we paid $30 to the local Elks club to have an electric and water hookup instead of a Wal-mart, like I stayed in the last time I was in Page. Page is over 100 miles from anything on either side in the Arizona desert near the Utah border, and all of the RV parks and recreational areas are super expensive. The last couple of times I came through, I stayed at the Wal-Mart, but $30 is definitely worth it to charge everything and have some electricity and water.
For the next three days, we basically had to go through the most scenic, yet most desolate, parts of Arizona, Colorado, New Mexico, and west Texas.
Belinda finally got to drive Dolly, because we were basically going for hours and hours, and it’s difficult to drive something that size for more than 5-6 hours at the most. It was nice for me to ride in the back for a while.
We made a brief stop in Colorado at the Four Corners and then headed south to Albuquerque, staying at a truck stop outside of the city. (They’re not fancy, but truck stops are invaluable – there’s 24-hour security and showers, and usually a semi-not-terrible breakfast.)
Then we headed straight east, stopping near Lubbock for some fried chicken livers …
… Seriously, Bush’s Chicken has the best fried chicken livers ever … and then we stayed at another truck stop near Sweetwater, Texas. From there it was just over 5 hours to my sister’s house in Houston, were we enjoyed the weekend before we headed to Louisiana.
My birthday was on April 1, and I celebrated in my (former but always) home of Ocean Beach in San Diego. Since my sister didn’t see me for my birthday, she had her home decorated for my birthday – complete with an amazing s’mores cake from the infamous Red Dessert Dive. I was really surprised … mostly because it was over two weeks past my birthday.
I still ate this amazing cake, though.
And it was great to spend time with my family. I’ve spent more time with my mom, my brother and my sister since I started this adventure than I had for the previous decade. I love being able to see them almost every time I travel.
After a relaxing weekend, Belinda and I drove to Louisiana, where she stayed and I kept going. It was bittersweet: I am so blessed to have friends who are able to join me for these adventures, and I know I’ll travel with her again.
I spent the night at Indian Creek, the awesome and beautiful Louisiana state campground that’s right near Belinda’s house.
It was a peaceful and lovely night by the lake, then I got up early the next morning and decided to get as close to Nashville as I could that day.
I had some friends I needed to swing by and say hello to in Nashville, but other than that I was in kind of a hurry – my mom’s birthday was coming up, and if I really hauled ass I could make it in time for her birthday dinner. I originally promised her I would be back for her birthday, but then I didn’t think I could make that after my repairs and the extra night in Paso Robles; I told her I would be at her house the day after, and of course bring a bunch of cool presents.
But I made really excellent drive time that day -nearly to Nashville by the time it was getting dark – so I decided the next day I would just stop briefly in Nashville and then get to my mom’s for her birthday dinner. And I made it!
As I type this, I am happily relaxing at my mom’s house, enjoying some of the wines I brought back from California and enjoying not driving for a few days.
My mom and my stepdad helped me to fix and organize a few little things in the RV, and tomorrow, I plan to hit the road again.
I am really, really excited about this leg of my journey. Basically, other than a college internship and a trip in high school, both to Washington, DC, I have, like, zero east coast experience. I have a lot of friends there, and a lot of things I would like to see, including another stop in DC, but I have never been. I am super excited about seeing something new. My plan is to head northeast from my mom’s house in east Tennessee, going to the Roanoke, Virginia area. The first night I will probably stay at a Harvest Host nearby and go to the Booker T. Washington monument, then head straight east to Virginia Beach. Then I plan to head north to Alexandria/ Washington DC, then to visit friends in the Philadelphia/ Jersey City area, then to Rhode Island and Massachusetts — then I am turning a sharp left and heading west, because I have to be back in San Diego for a bone scan on June 2. But, I also plan to go west through Pennsylvania, Ohio, Indiana, and several other states where I also have never visited.
Simply put, everything from when I leave here until I get back to California will be new to me.
And I can’t wait.
Please join me and follow along on social media … this part will be awesome!
Are you enjoying this content? Please support my adventure by donating to my Gofundme here!
After I got my poor window fixed, I spent a few days camping around San Diego. I wanted to do some desert camping in the month of March, before it got super hot or super crowded.
But before we headed to the desert, my brother and sister-in-law took me to the Taste of Boysenberry Festival at Knott’s Berry Farm. I had never been before and my last time at Knott’s was when I was like nine years old … but my big brother and SIL go there all the time (when there isn’t a pandemic). Attendance was limited, pandemic precautions were pretty intense, and all of the rides were closed; the park was open as a food festival only. And it was amazing. The park is a fun place to be no matter what the event is, and all of the food was great.
I was really impressed with their pandemic procedure … everyone had to wear a mask except for when they were actively sitting down and eating food. The rest of the time – walking, ordering, anything else – you had to be masked up. No walking and drinking or eating. Everyone over the age of 2 was in a mask. If you let it slip, they’d remind you to pull it up.
It was also super fun to hang out with my brother and sister-in-law … they’ve only recently come into my life, but we have a really fun and loving relationship, and I am so thankful for it. Plus, he’s a theme park blogger (check out Park Journey) and knew everyone at Knott’s. It was much better going there when it was limited in numbers and I was with someone who knew their way around.
And yes, I bought him that super cool shirt.
The food was really amazing as well. There were a few dishes that were really good, a few that were OK, and a couple of special dishes, like the bao bun with boysenberry kimchi, that slapped so hard I want them to sell me that kimchi in a jar. Or a 5-gallon bucket.
The next week, Belinda and I went to Lake Cahuilla, which is a man-made lake just outside of Palm Desert, and a Riverside county park that offers primitive and hook-up RV camping. (For the uninitiated, “full hookup” usually refers to electricity, water and sewer hookup at the campsite itself. Most of the ones that offer “partial hookups” only refer to the electricity and water, but those campgrounds invariably have a sewer dump you can use, just not at your actual site. Primitive is no hookups at all.) We had partial hookups and a dump station on site. We stayed there for five days, and it was super windy for a couple of those days, so we didn’t spend as much time outside of the RV as I had planned.
Lake Cahuilla is technically in the desert, but it’s in almost a canyon … totally surrounded by mountains. So when the wind blows, it’s pretty intense, but when it’s calm, it’s very nice and peaceful. We just had to do most of our cooking inside the RV, or if we did it on the campfire, the food was totally covered to protect it from dust storms.
But it’s a really beautiful place; and you can fish in the lake, hike in the surrounding mountains, or golf or shop in nearby Palm Desert. We opted to chill at the lake … we walked around a but but due to the wind, we mostly stayed indoors.
Of course, because it was Belinda and I, and because we had to be indoor-sy for the week, we ate really, really well. One day we grilled some kama (yellowtail collar, the most tender and delectable part of the fish) and made a beautiful salad, and washed it down with this lovely chilled rose from one of the wine tasting ventures we went on while traveling around California last month.
We also made some polenta cakes with a homemade “Sunday gravy” I was given as a gift, and paired it with the Big Ricardo red blend from Chronic Cellars.
We’re really getting the hang of this wine pairing thing!
I also forgot to mention that I got some amazing boysenberry mustard when I was at that Boysenberry Festival. Over the past month I have used it on so many things … as part of a dip for grilled artichokes, in a potato salad and multiple sandwiches, we coated some steaks in it before we grilled them, …
… and on a really epic homemade chicken salad. I will post the recipes soon (really because I need to get another jar to make a few more recipes from it).
I even got in a little bit of a spa day before the wind picked up again. Isn’t it lovely out there? I can’t wait to come back.
The next week, Belinda went to celebrate her sister’s birthday with her family in Big Bear. After my previous accidental snow driving, I did not want to go. Plus I had reservations at the Salton Sea state recreation area, which is another great desert camping spot. I was there by myself, but it was really lovely and peaceful.
Salton Sea is a very unique place with a lot of history … back in the 30s, it was a military test site. In the 50s and 60s, it was a vacation getaway known as the “California Riviera,” with more annual tourists than Yosemite. Then in the 70s and 80s, it all started going to hell. The sea dried up and became increasingly polluted, and everyone who lived there left.
I was spending a few days at the state park, which is on the northeastern end of the sea. I can see how this was such a tourism draw back in the day when it was clean and lush … from the eastern shore, you can see spectacular sunsets over the western mountains. But then every few years there is a huge die-off of fish, and the whole sea (some 40 miles wide and almost 60 long), which produces a smell and a sight like you can’t imagine.
I couldn’t live there, but I sure enjoyed a few days checking it out.
In a way it’s unfortunate that the Salton Sea has had such a bad rap, but I was happy to take advantage of a nearly empty state park. I made a really awesome untrimmed tri-tip (it was windy at the Salton Sea as well, but not the entire time like when we were at Lake Cahuilla), and it was several meals for me (especially since I was by myself).
After a couple of meals full of steak and potatoes (the best campfire side dish, in my opinion), I made garlic bread and tri-tip, tri-tip and eggs for breakfast, tri-tip salad for lunch, tri-tip nachos, and more.
Then, I was really tired of eating tri-tip.
I had a couple more weeks to kill in San Diego – Belinda’s mom had surgery at the end of March, so she committed to at least two weeks of being at home to help care for her post-surgery. We tentatively planned to leave on the 7th of April. That left me more time for more desert camping, and a bit of beach fun around my birthday on April 1. But first, I went back to one of my favorite places to camp in San Diego county: Sweetwater Regional Park in Bonita.
It’s really a beautiful and peaceful campground. It’s near the freeway so you are close to civilization, but it’s quiet and mellow and there are gorgeous sunset views.
That week, I also got to go sailing! My friend has a membership in a cool sailing club where you can basically use a boat for as long as you like, and they handle all of the maintenance, etc. We had a lovely time sailing around Coronado Island and the San Diego Bay. And it was perfect weather.
I was also really happy to get a new discount pass: both the national parks and the California state parks systems have a free (or super-cheap) lifetime pass for people with permanent disabilities. I’m really excited to have free access and super cheap camping at parks now!
Before the end of March, we did one more desert camping spot: Agua Caliente is a San Diego county regional park, but it’s inside Anza Borrego state park. All of the state park campgrounds were primitive only, so we opted for a county park spot. It was a full moon that weekend and the skies were incredible.
There were no lights other than campfires and campers, but it looked like there was a street lamp on, it was so bright. I have a pretty good camera on my phone, but my apologies because even my good camera doesn’t do justice to how pretty it was.
My brother and SIL joined Belinda and I for the first day there, and we had a blast hiking, taking mineral showers, and cooking up some deliciousness on the wood fire. I have gotten really good at building a campfire, and I had a lot of experience with a grill and smoker before so it’s a great time adjusting those techniques and recipes for a campfire.
One of my goals for this trip was to spend my birthday on the beach, and I was successful in that, at least. I parked for a few days on the street in Ocean Beach, moving my space during the day when the parking was easier, and hanging out with friends in the evening. I met people for happy hours and brunches and lunches and kombuchas in various rooftop bars and patios and outdoor seating areas. It was a few days of lots of drinking and eating and celebration, and it was wonderful. I won’t rehash all of the amazing food I ate all over again, but check out my Insagram for some awesome photos and videos (check out the video of me dipping a birria taco)!
Before I left town, however, I wanted to check out one more of the San Diego county parks. I think I have mentioned it before, but I was really impressed with the county parks. They have a great reservation system, they’re clean and the staff is friendly, and they’re always just good places to be with relaxed vibes. Travel can be stressful sometimes, and it’s nice to have peaceful places to camp. I mean, a truck stop parking lot will do if you just need a place to get some sleep, but if you’re gonna camp, you want it to be nice, you know?
So the last park on my list in San Diego was Guajome Lake park, which is technically in the city of Oceanside, but is also in the mountains with a lake. It had lovely birds and wildlife, and pretty trails for hiking and biking. Like Agua Caliente, it also has cabins for rent close to the RV and tent camping sites, so I think in June I might camp here again with my brother and his family (they would be in a cabin).
All of this desert fun has also done a number on my brakes; when I got back from the Salton Sea my wheel well was making a weird grinding sound. I wasn’t able to see my mechanic for another week so I kept driving. The brakes still seemed fine up until this past week, when I was driving from Sweetwater to a new campsite at Guajome. As I braked, the wheels made a horrible noise. I gingerly and slowly applied the brake again, and it made a worse sound, and shook the whole vehicle as it finally came to a stop. As I pulled into my campsite, I noticed fluid (presumably brake fluid) leaking from my wheel well.
(Photo credit: my sister-in-law Kristi Condon)
After that, I was too freaked out to drive Dolly to my mechanic … I was already planning to see him about an issue with my tail lights, but I didn’t want to risk my brakes completely failing so I called a tow truck. After a terrible ride (the driver wouldn’t wear a mask, and totally damaged my trailer hitch getting Dolly on and off the truck), my mechanic confirmed my worst fears: it was bad.
My brakes were completely shot. Since I don’t have any of the service records for my RV (the previous owner literally stole them out of the RV after he sold it to me), for all I know, the brakes on there are the originals. I know the shocks are the originals. Bernie (my mechanic) showed me how the front rotors were completely destroyed; one was cracked and the other was worn down to a sliver. The back drums weren’t much better and the shocks were old and frayed. Basically everything needs to be replaced. And the electrician had to rewire my whole trailer to get my back lights to work.
As I write this, my RV is still in the shop, and will hopefully be ready tomorrow, and we can hit the road the next day. It will likely cost about $2,000 total for all of the repairs, which is basically all of my money, but I feel much better knowing that it will all be fixed. I’m lucky that I have a trusted mechanic here, instead of finding out when I’m in the middle of nowhere that my brakes or my lights don’t work. It would cost me considerably more. I’m also blessed that I didn’t find out about my brakes by getting into an accident, although that last trip was kinda sketchy. This is lame but it was the best possible outcome.
I’ll be on the road in a couple of days and headed east. I plan to go through Vegas, the desert, Houston and Louisiana, then to my mom’s house in east Tennessee for a few days before I see the east coast. This is the part I am really excited about! Basically other than a school trip and a college internship in Washington, D.C., I pretty much have no experience on the east coast. I don’t have to be back in San Diego again until the first of June, so I plan to see some things and some people on the Atlantic coast before I head west again. I’m looking forward to finally checking more states off of my map!
I can’t wait to see more of our beautiful country, and to share it with you. Stay tuned for my next adventure!
Please donate to my GoFundMe to assist with repairs, of you are able!